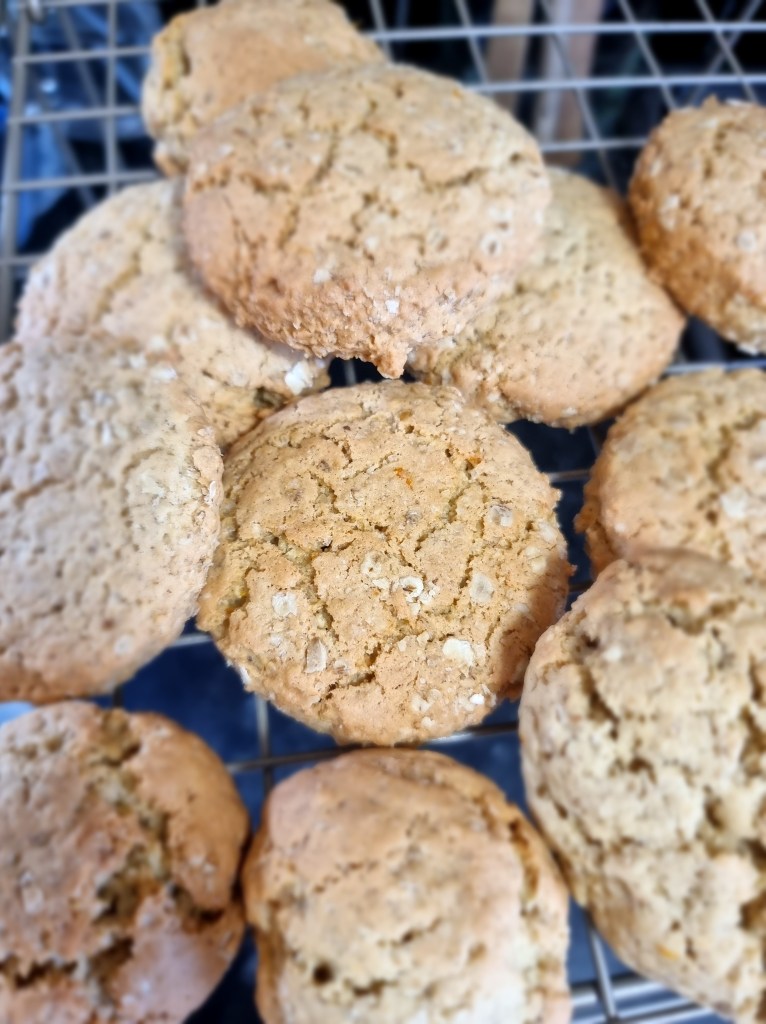
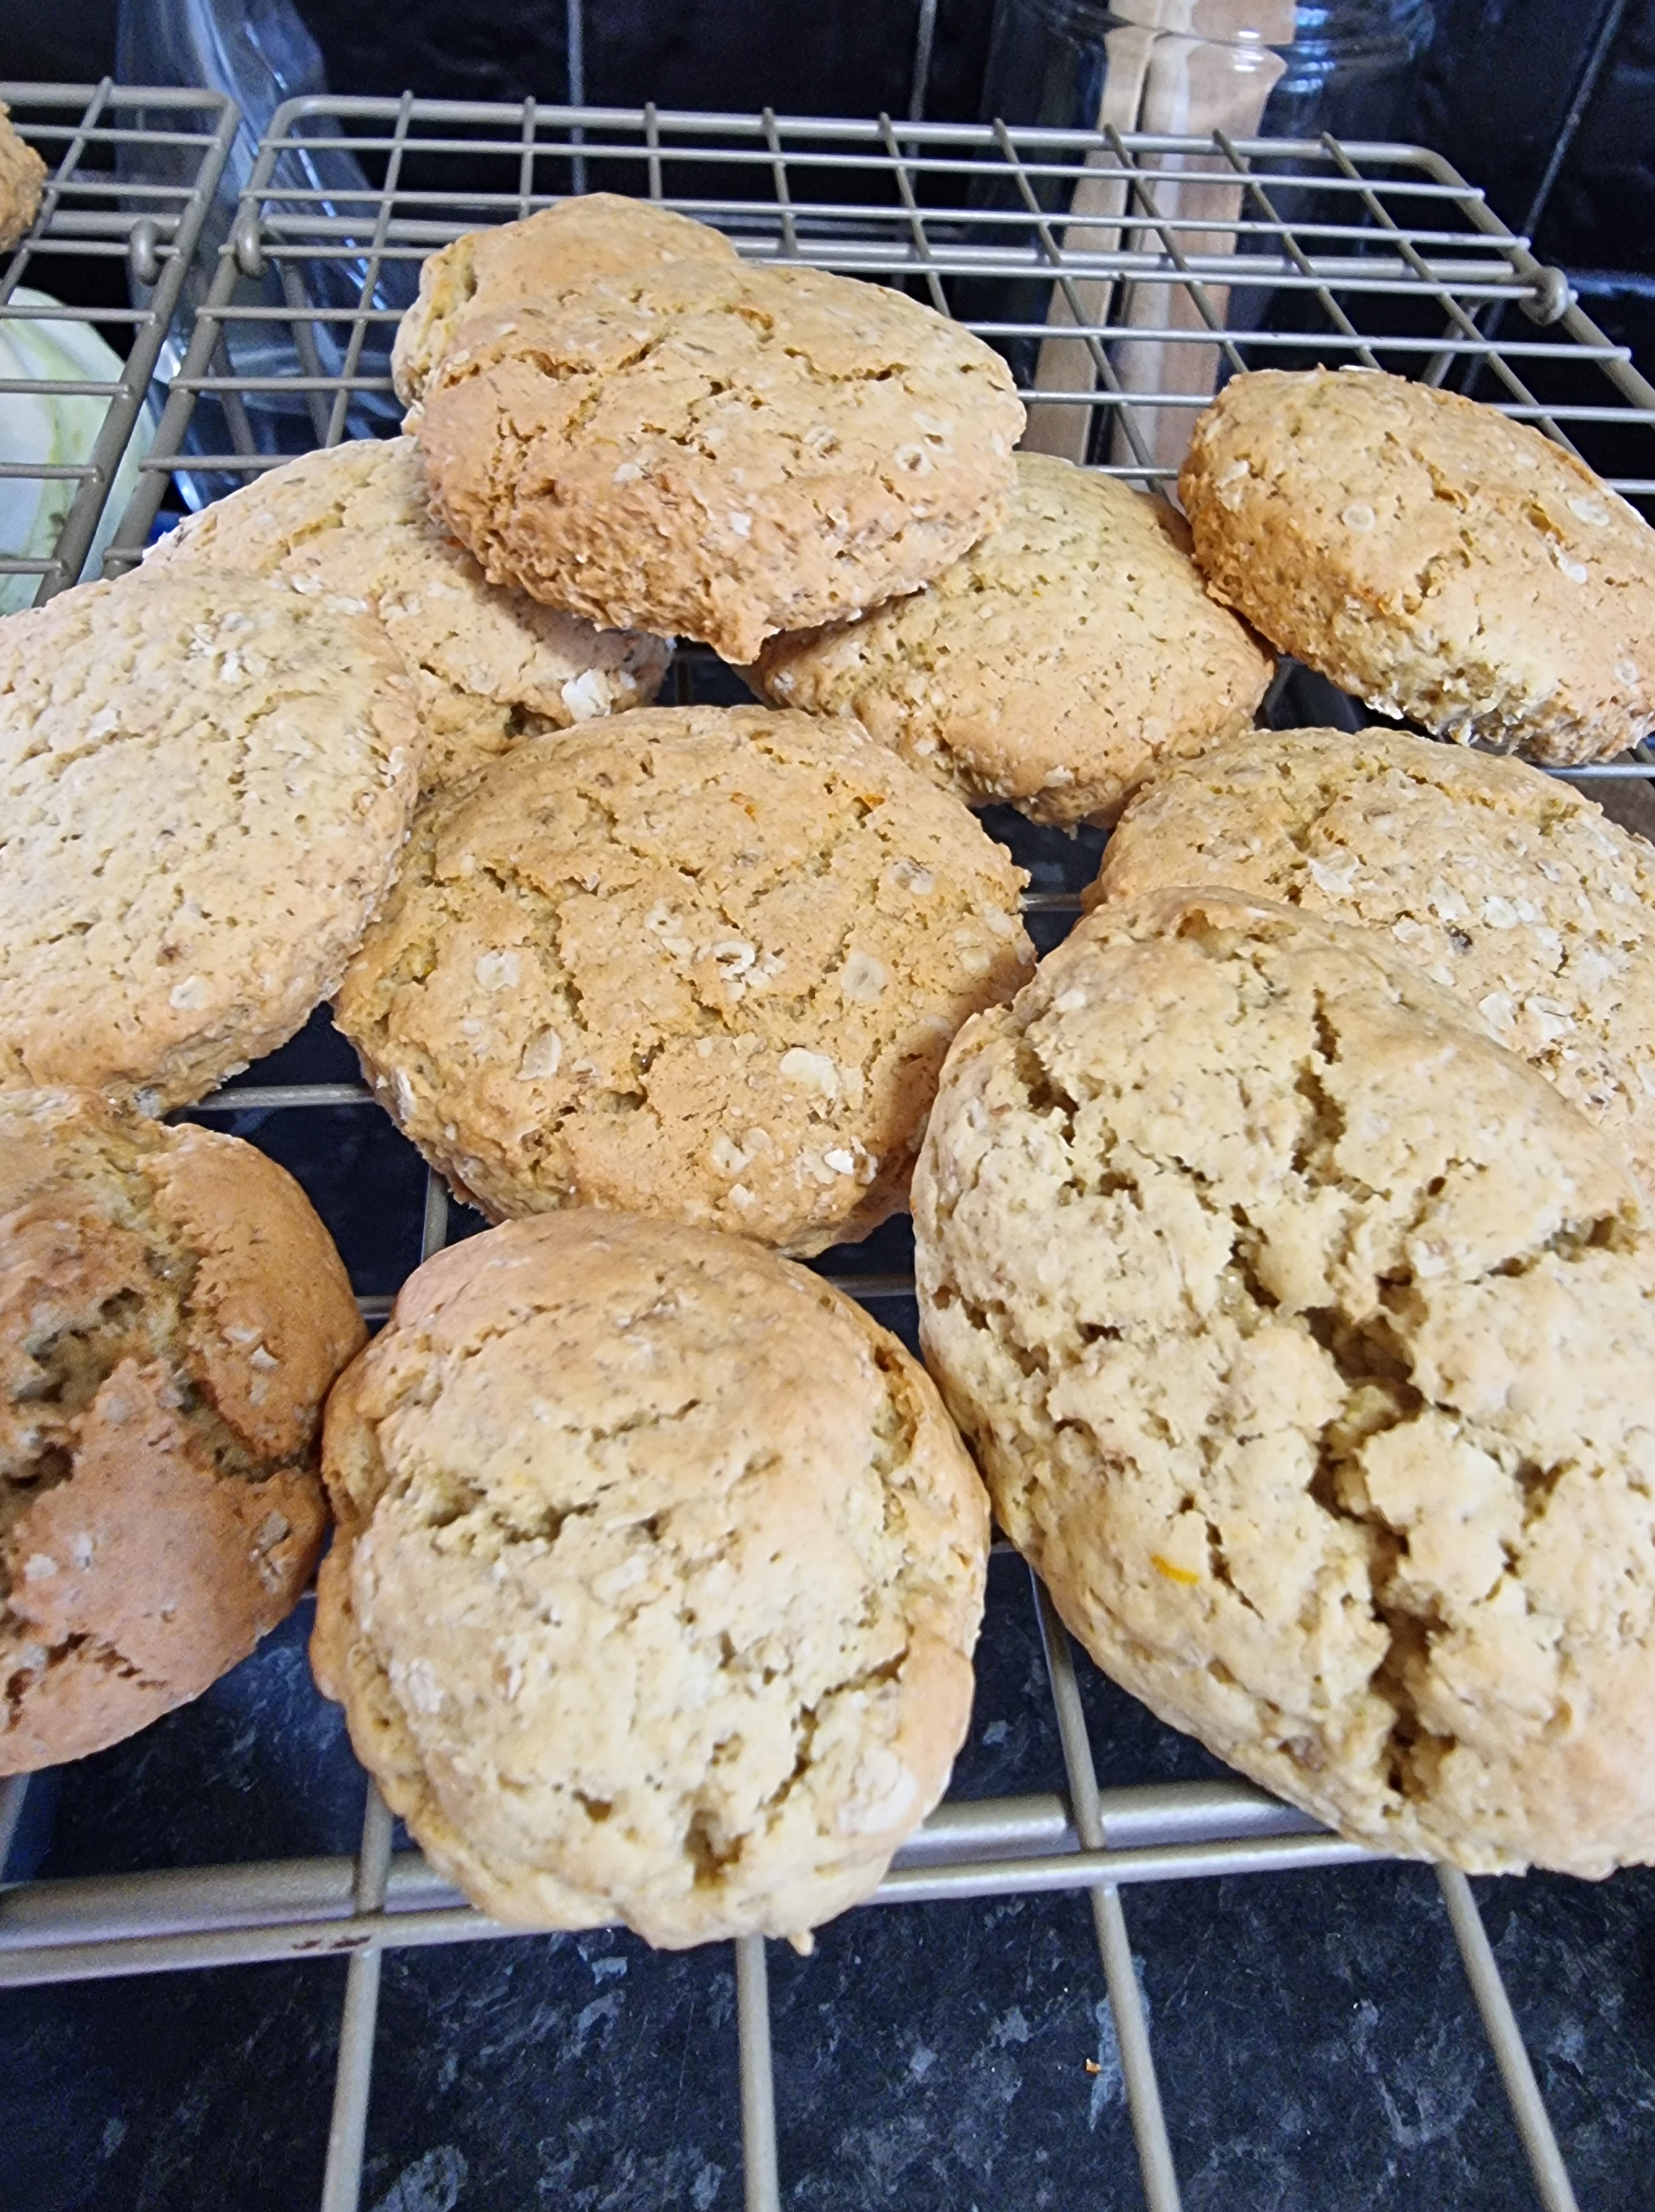
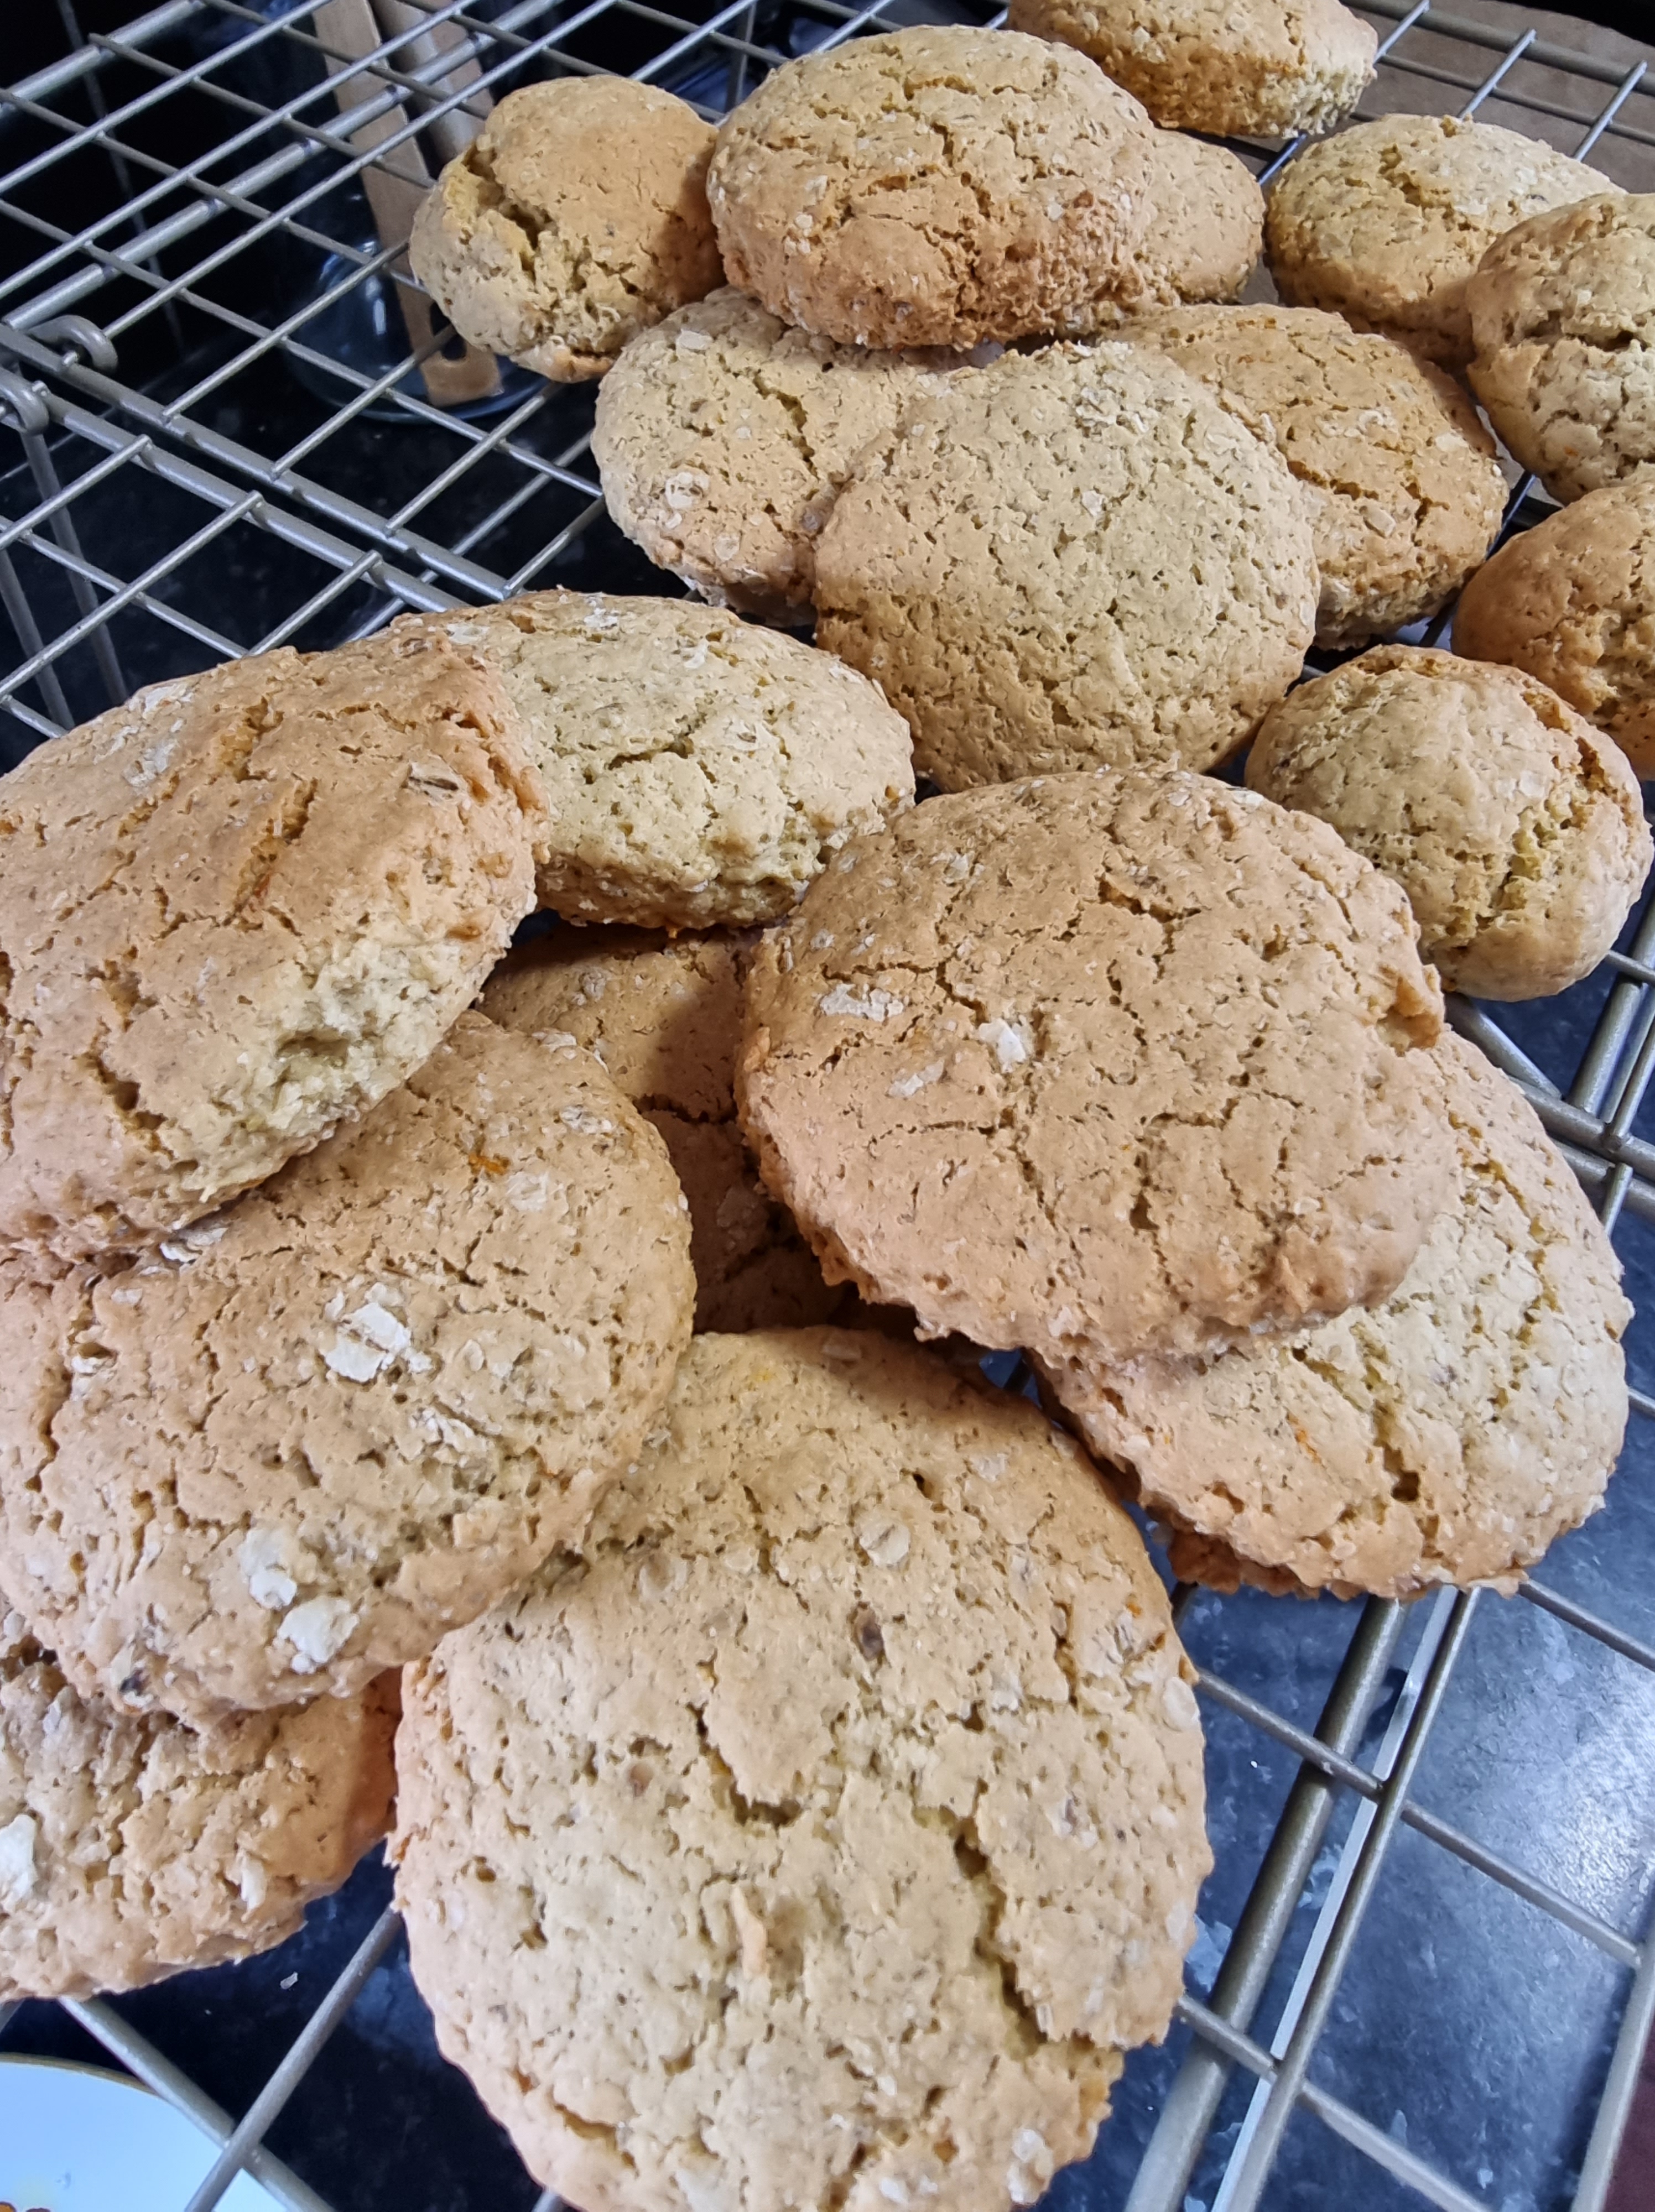
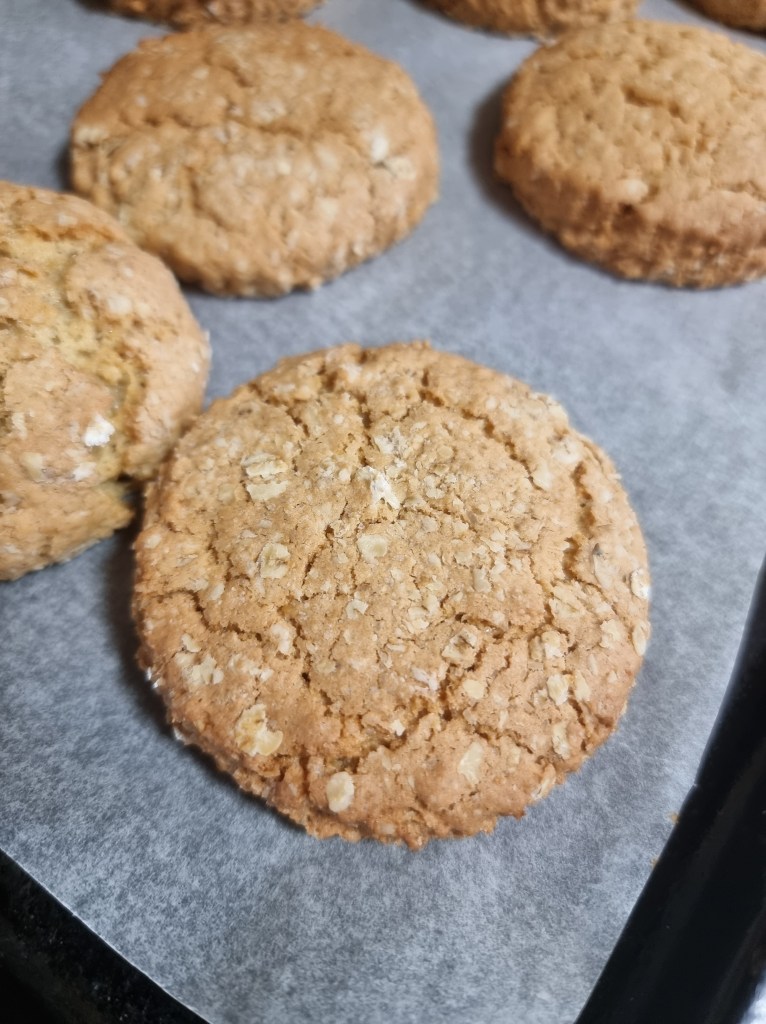
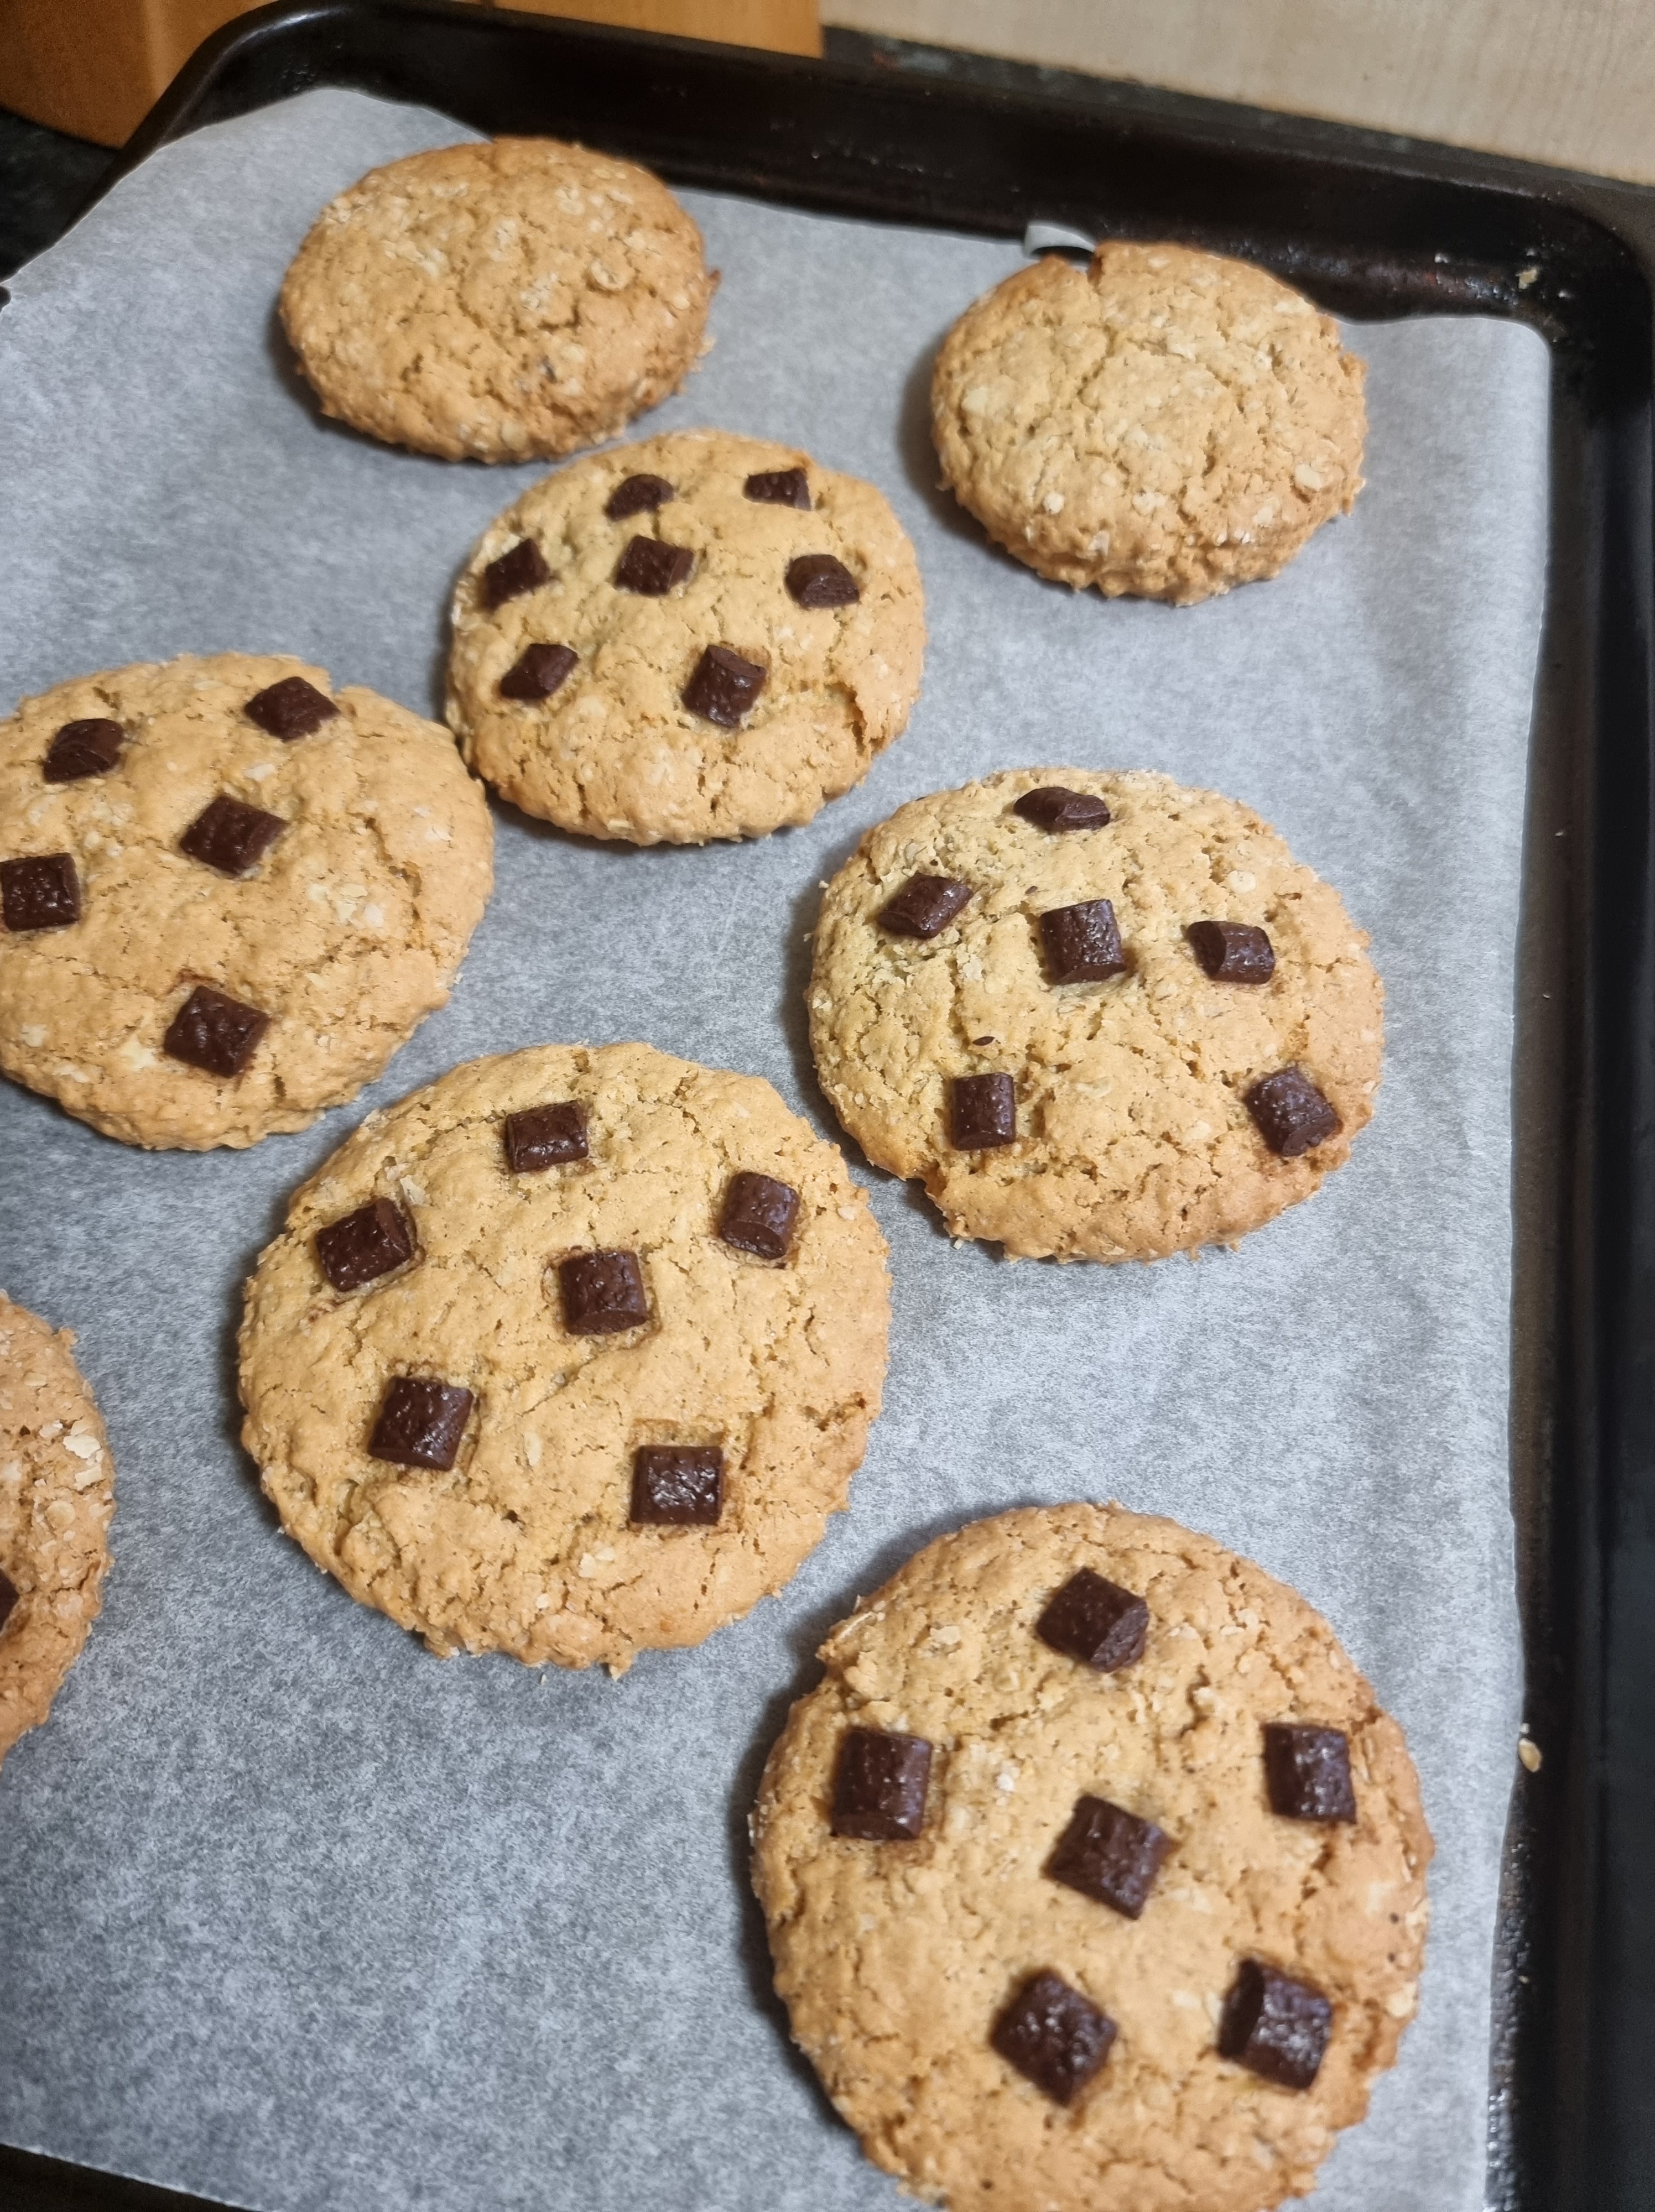
This is a variation on the oat, coconut and choc chip cookie, taking out the coconut and choc and using orange instead. I guess if you wanted orange and chocolate chip cookies, then leave the chips in 🙂
85g Granulated sugar
85g Demerera sugar
100g butter (at room temp)
300g Plain Flour / All purpose flour
1/2 tps salt
1 tsp baking powder
1 tsp baking soda
1 egg
125g oats (you may need to add more if the mixture is a bit wet)
1 Orange – grate a bit of rind when needed, then use the juice of the whole orange
2 tsp of orange extract
60g choc chips optional
Cream the butter and sugar together until smooth (ish), add the egg, orange rind, juice and extract and mix. Then add the flour, salt and baking soda & powder. It needs to start binding like a dough, so if it’s a bit sloppy, then add a bit more flour (I didn’t weigh mine before adding, so went from 250g to 300g in the ingredients, but a bit more may be needed).
Once it’s binding well, add the oats by hand. Then put on a baking sheet and flatten out with your hand to about 1 – 2cm depth. Then use a cookie/biscuit cutter to get your desired shape and size.
Put on a baking tray either greased or on baking paper, and cook for around 10 – 15 mins or until going brown at 180 degrees.
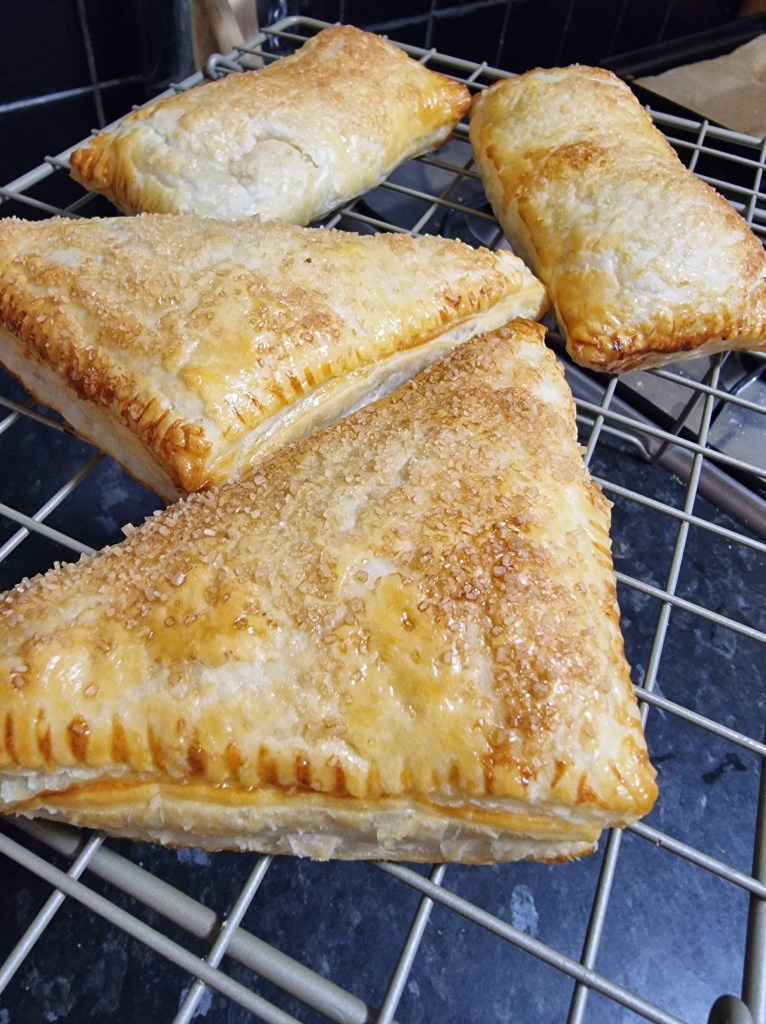
Turns out the oat cookie recipe works with orange, just a bit more flour and oats needed to compensate for the orange juice – i’ll update and post the recipe later in case anyone wants to give them a go. Also decided to get some cherries and make cherry turnovers, as they are a favourite. I haven’t had a cherry turnover since the ‘Nobody likes a mouldy turnover‘ incident with the local bakery.
But it inspired me to start baking more at home, so it turned out to be a good thing.
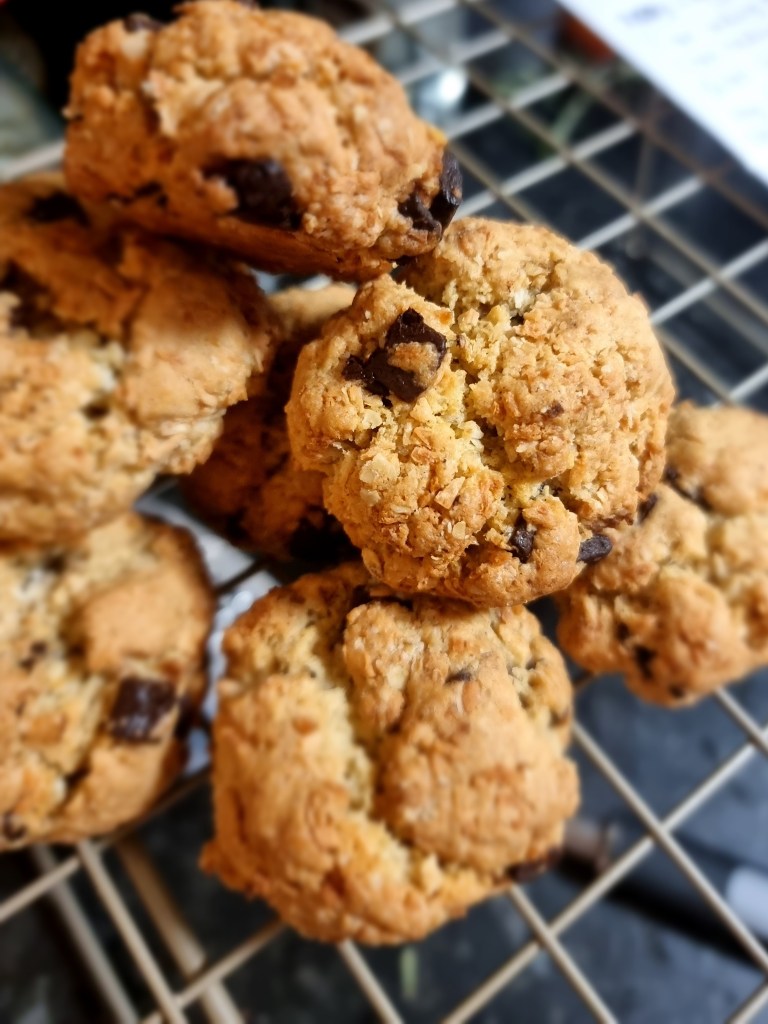
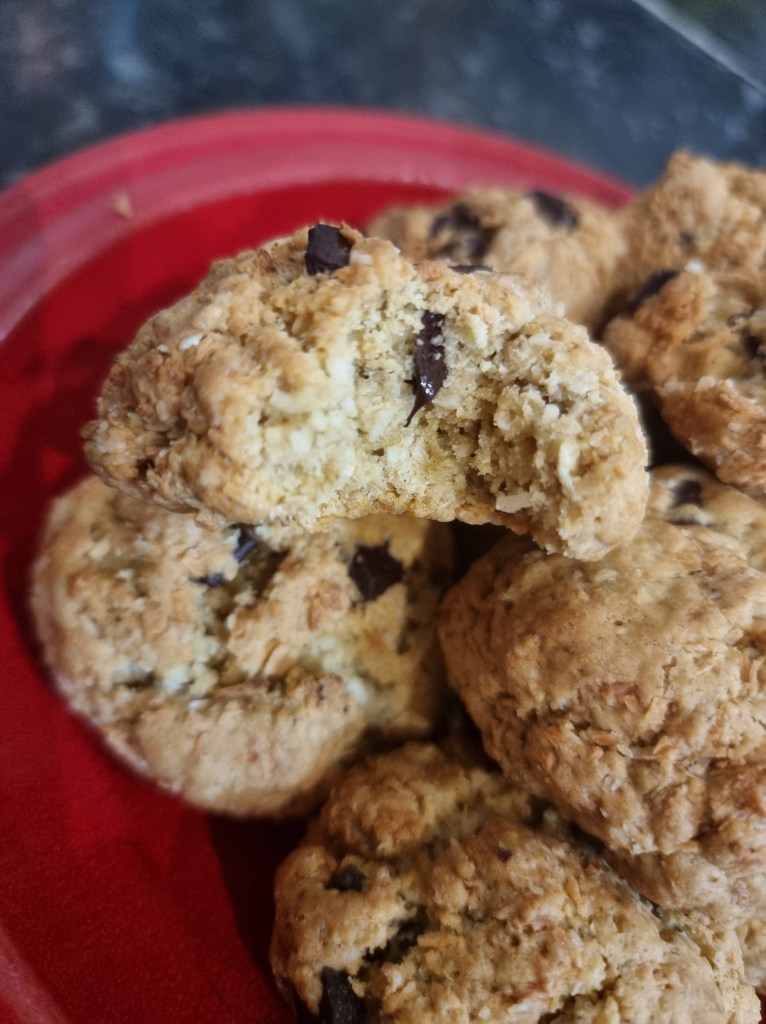
Definitely the new go to recipe for homemade cookies 🍪.
250g All purpose flour (plain flour in the UK)
1 tps baking soda
1tps baking powder
1/2 tps salt
100g granulated sugar
100g brown sugar
100g butter (at room temp)
1 egg
1 1/2 tsp vanilla extract
100g oats
100g desiccated coconut
100g chocolate chips
Cream the butter and sugar together, then add the extract and egg, mix well.
Add the flour, salt and baking powder/soda.
Mix in the coconut, oats and chocolate chips by hand. Shape either into small balls and flatten slightly, or flatten out the mix and use a cookie cutter. I did some more today using that method, and without coconut and chocolate for some, as coconut is not to the entire households taste 😉
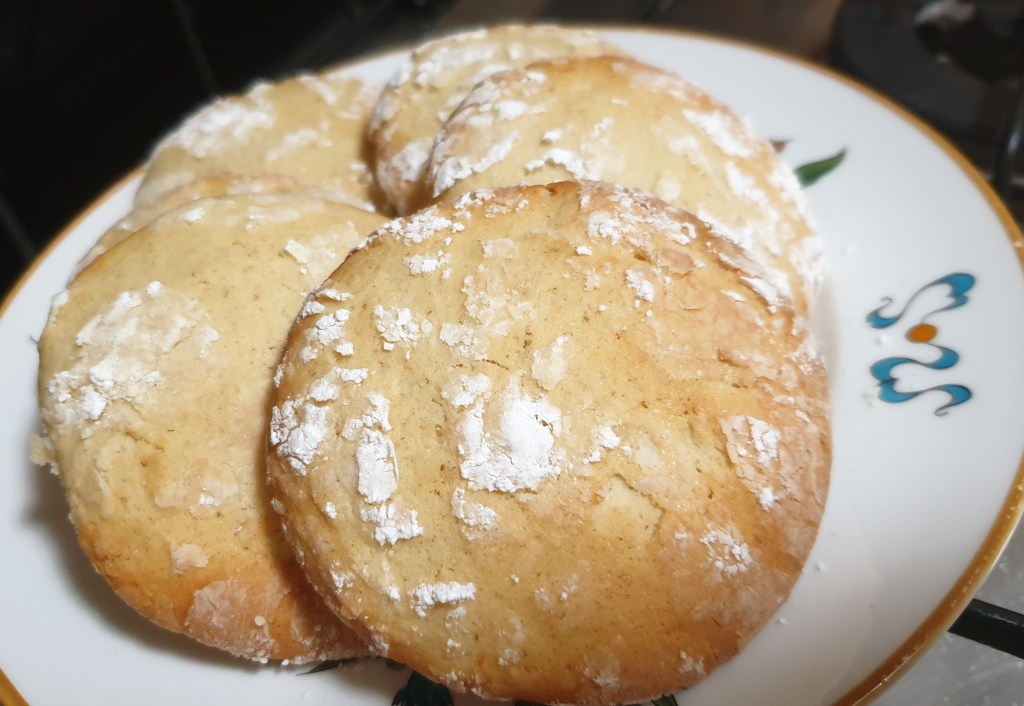
Bake at 180c for around 10-15 minutes or until golden brown. Let cool, then eat them!
Seperately cream the butter and sugar together, add the egg, orange zest and juice and mix until you have what looks like a horrible scrambled egg type mixture. Then add half the flour and mix through, then add the rest of the flour and mix well until you have a creamy looking dough and pop in the fridge for a bit.
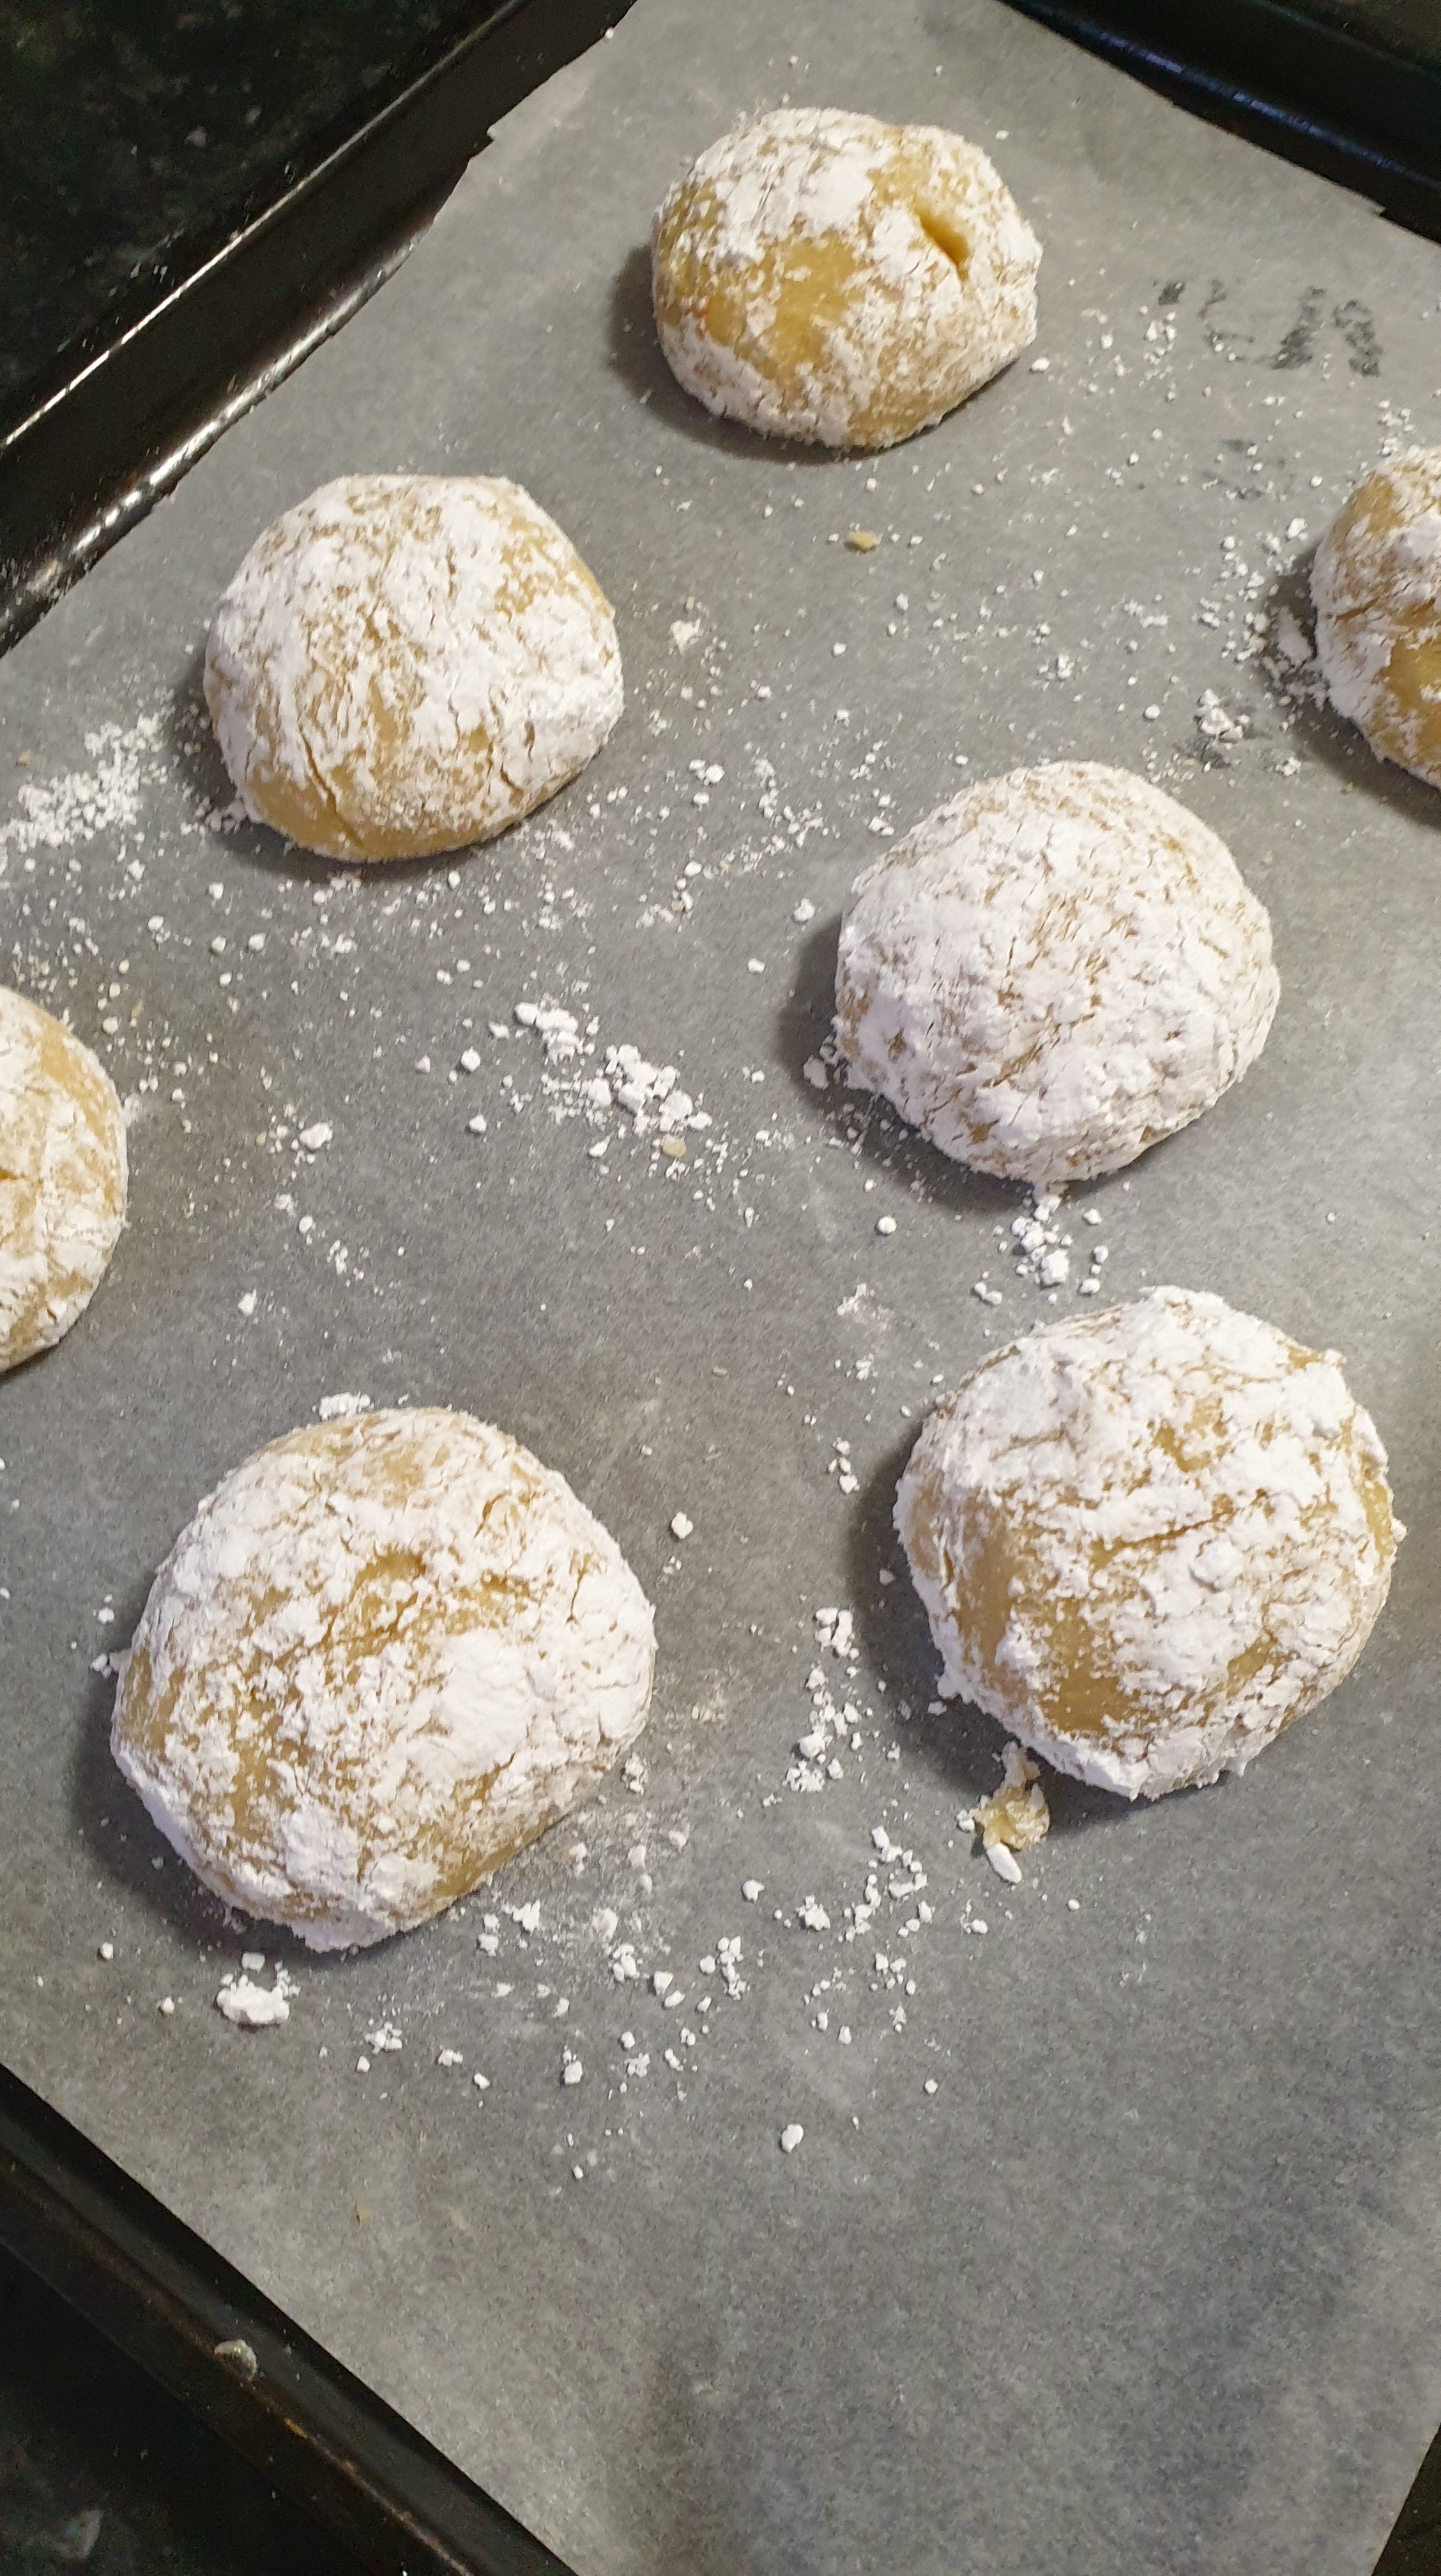
I never usually let anything rest in between, but this time I did, having ruined the first batch with lemon a couple of weeks ago, and addressed an long standing issue I have with baking biscuits and them going wrong. Turns out impatience and ignorance were the culprit! No real surprise there for me. But I gave thought to what it is I get wrong, and there appeared to be a theme with these, they spread and don’t hold their shape. So, finally thought to ask the internet, and turns out it’s the butter being too warm obviously having been a room temp the whole time (or even melted first for choc chip cookies) and then being worked on and getting warmer. The trick is apparently to put in in the fridge or freezer for a time once you have made the dough, so it can solid up again. Makes sense know I now, and it worked, obviously. It’s my own fault as the video which I got this recipe from (linked at the bottom) clearly tells you to put it in the fridge, but you know how it is, sometimes we think we know best.
After creating small balls of dough, they are then rolled in icing sugar and placed on baking paper on a tray and into the oven. I’m going to see if tangerine’s work just as well for this later, and in ice-cream, so fingers crossed for more orangey snack and treats 🙂
(c) K Wicks
Here is the link to the YouTube vid where got the recipe and method, just swapped the lemon for orange.
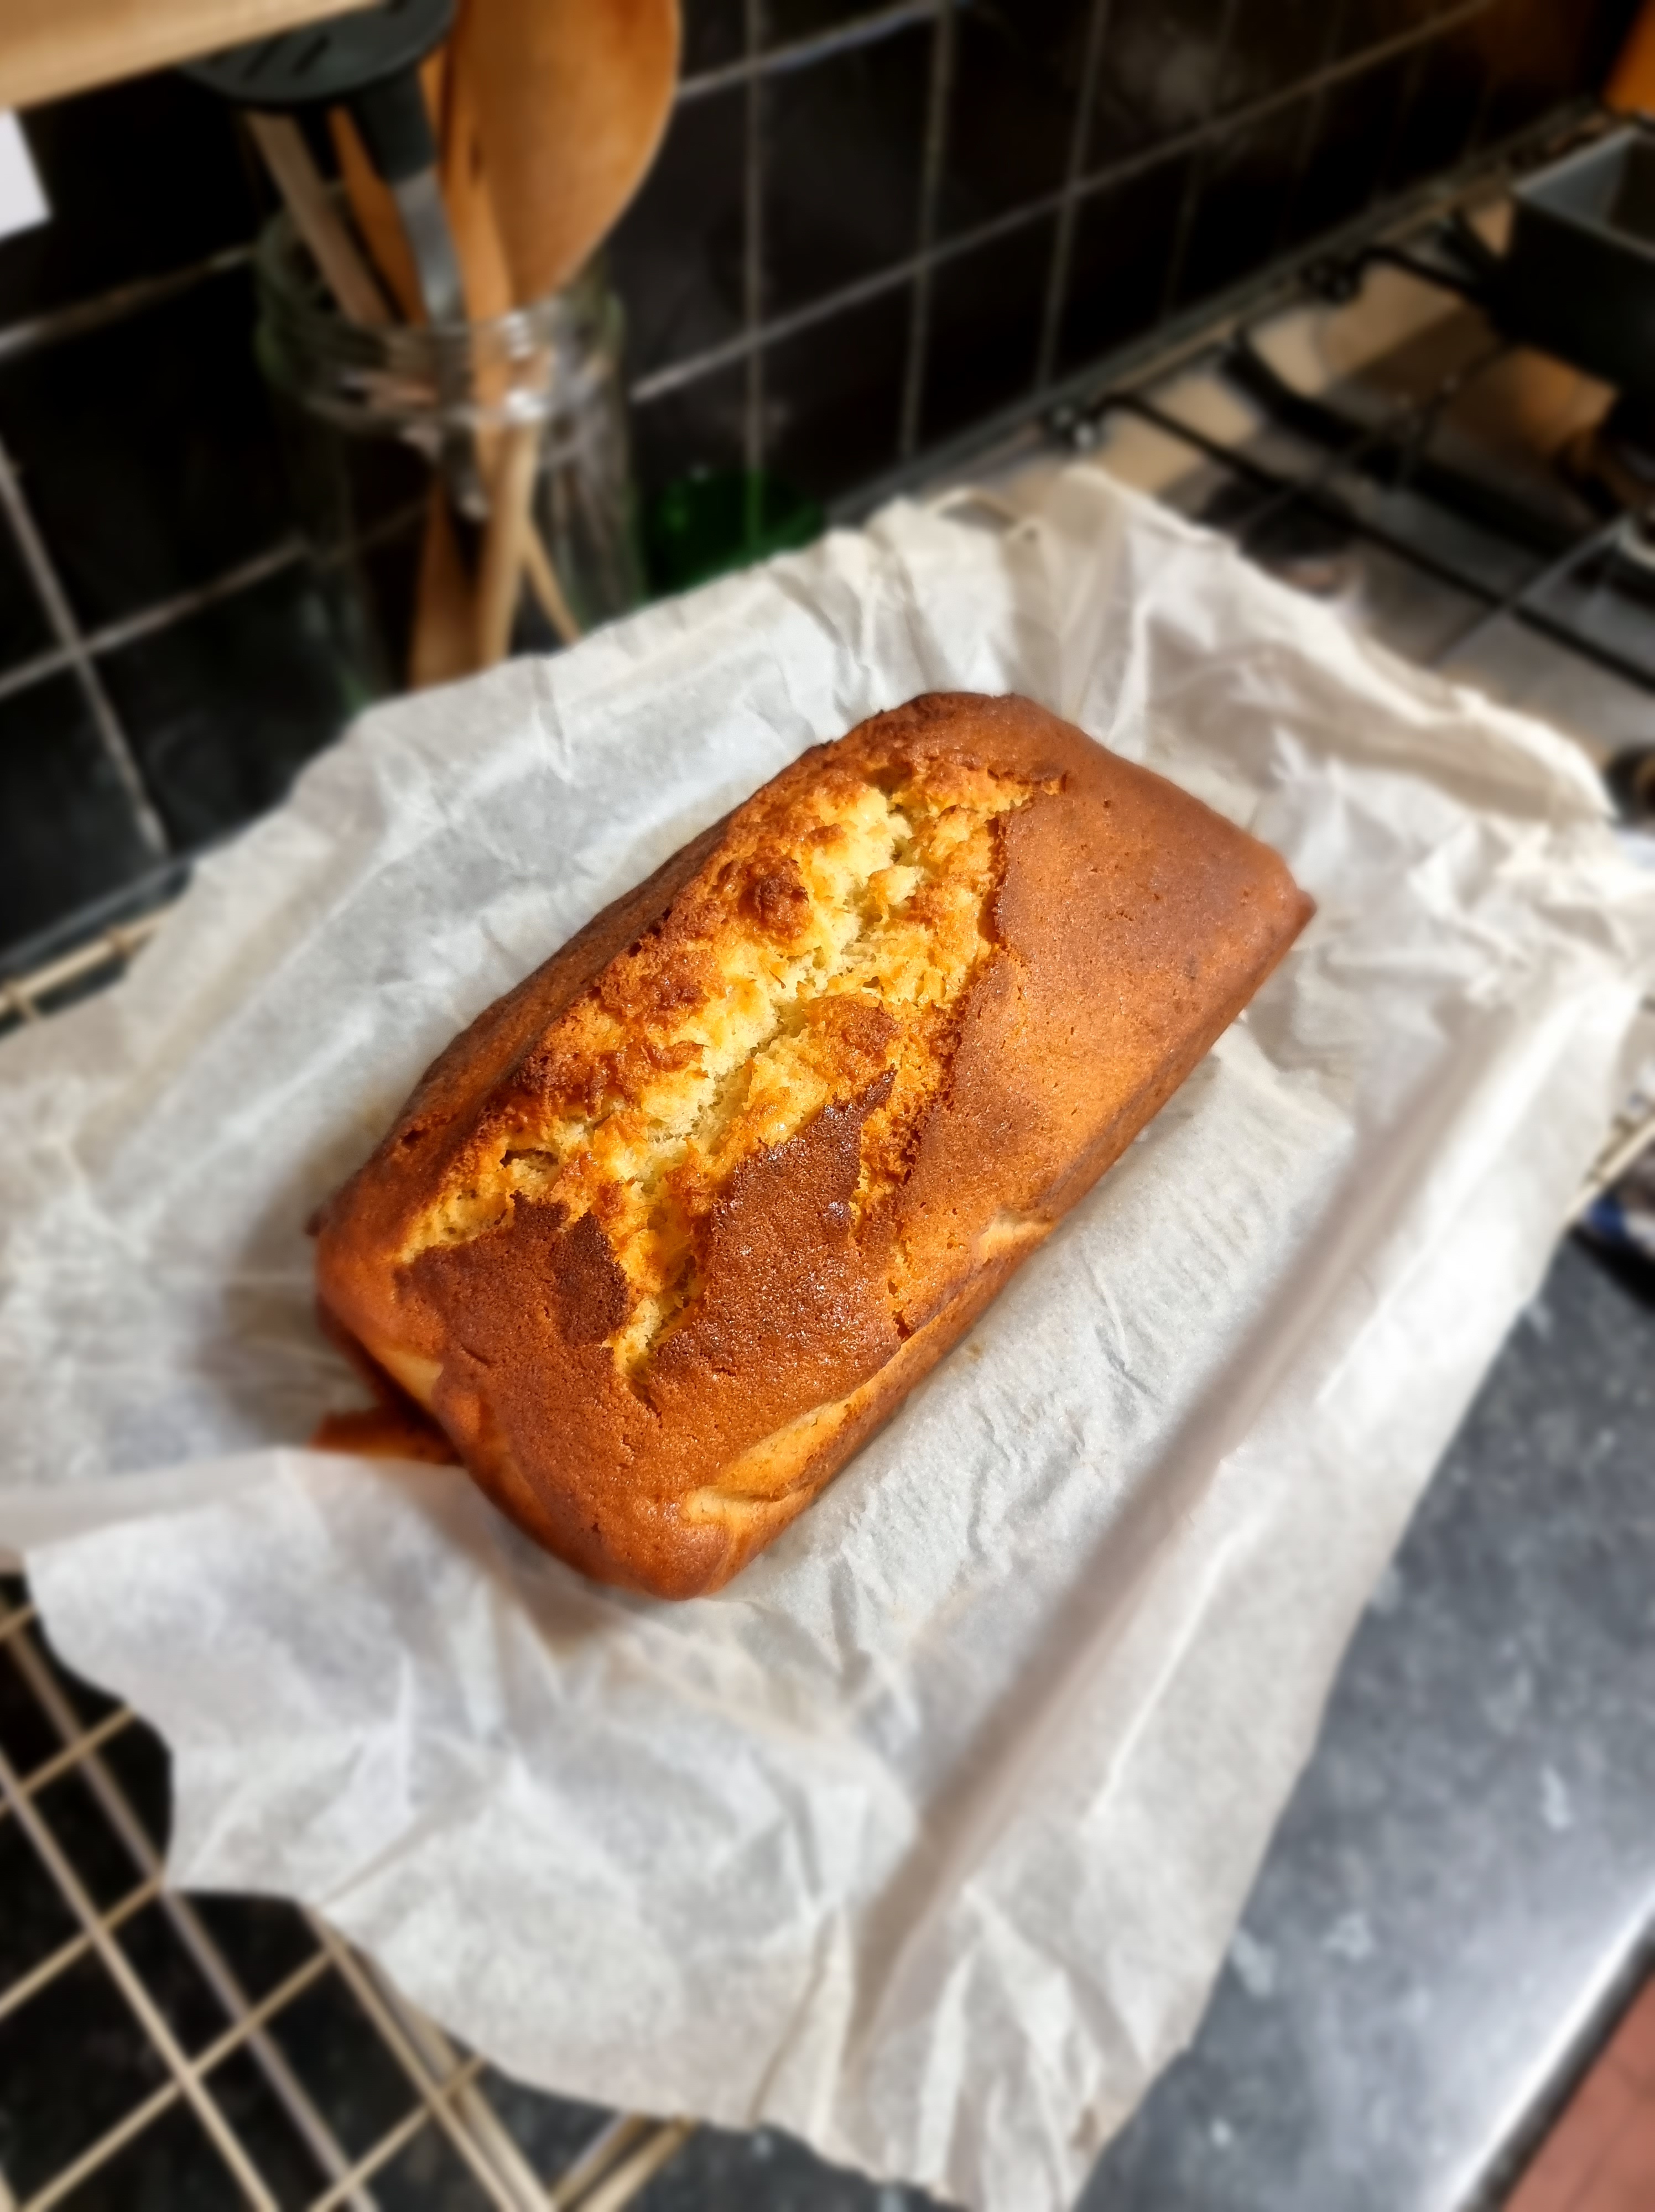
Thought I would give baking bread a go by hand. A very quick method and was so easy it made me feel a bit silly for not realising it was this quick and simple to do.
350g bread flour
200ml warm water
2 tbsp sunflower oil
1/2 tsp dried yeast
1 tsp salt
Mix the water, salt, yeast and oil together. Then add the flour. Work together to form a sticky dough.
Place on a mat/surface with some flour and knead. This one required being rolled in on itself a few times after a short time kneading (like you would roll up a pair or trousers for packing), and pinched in where it joins.
Then place in a tray on baking paper and cover with a tea towel for half an hour to give it time to rise.
Then score down the middle with a knife to give it room to spread. Sprink with flour. Bake for 25 mins at 190 Celsius. (Halfway through take out and sprinkle or spray a bit of water on it).
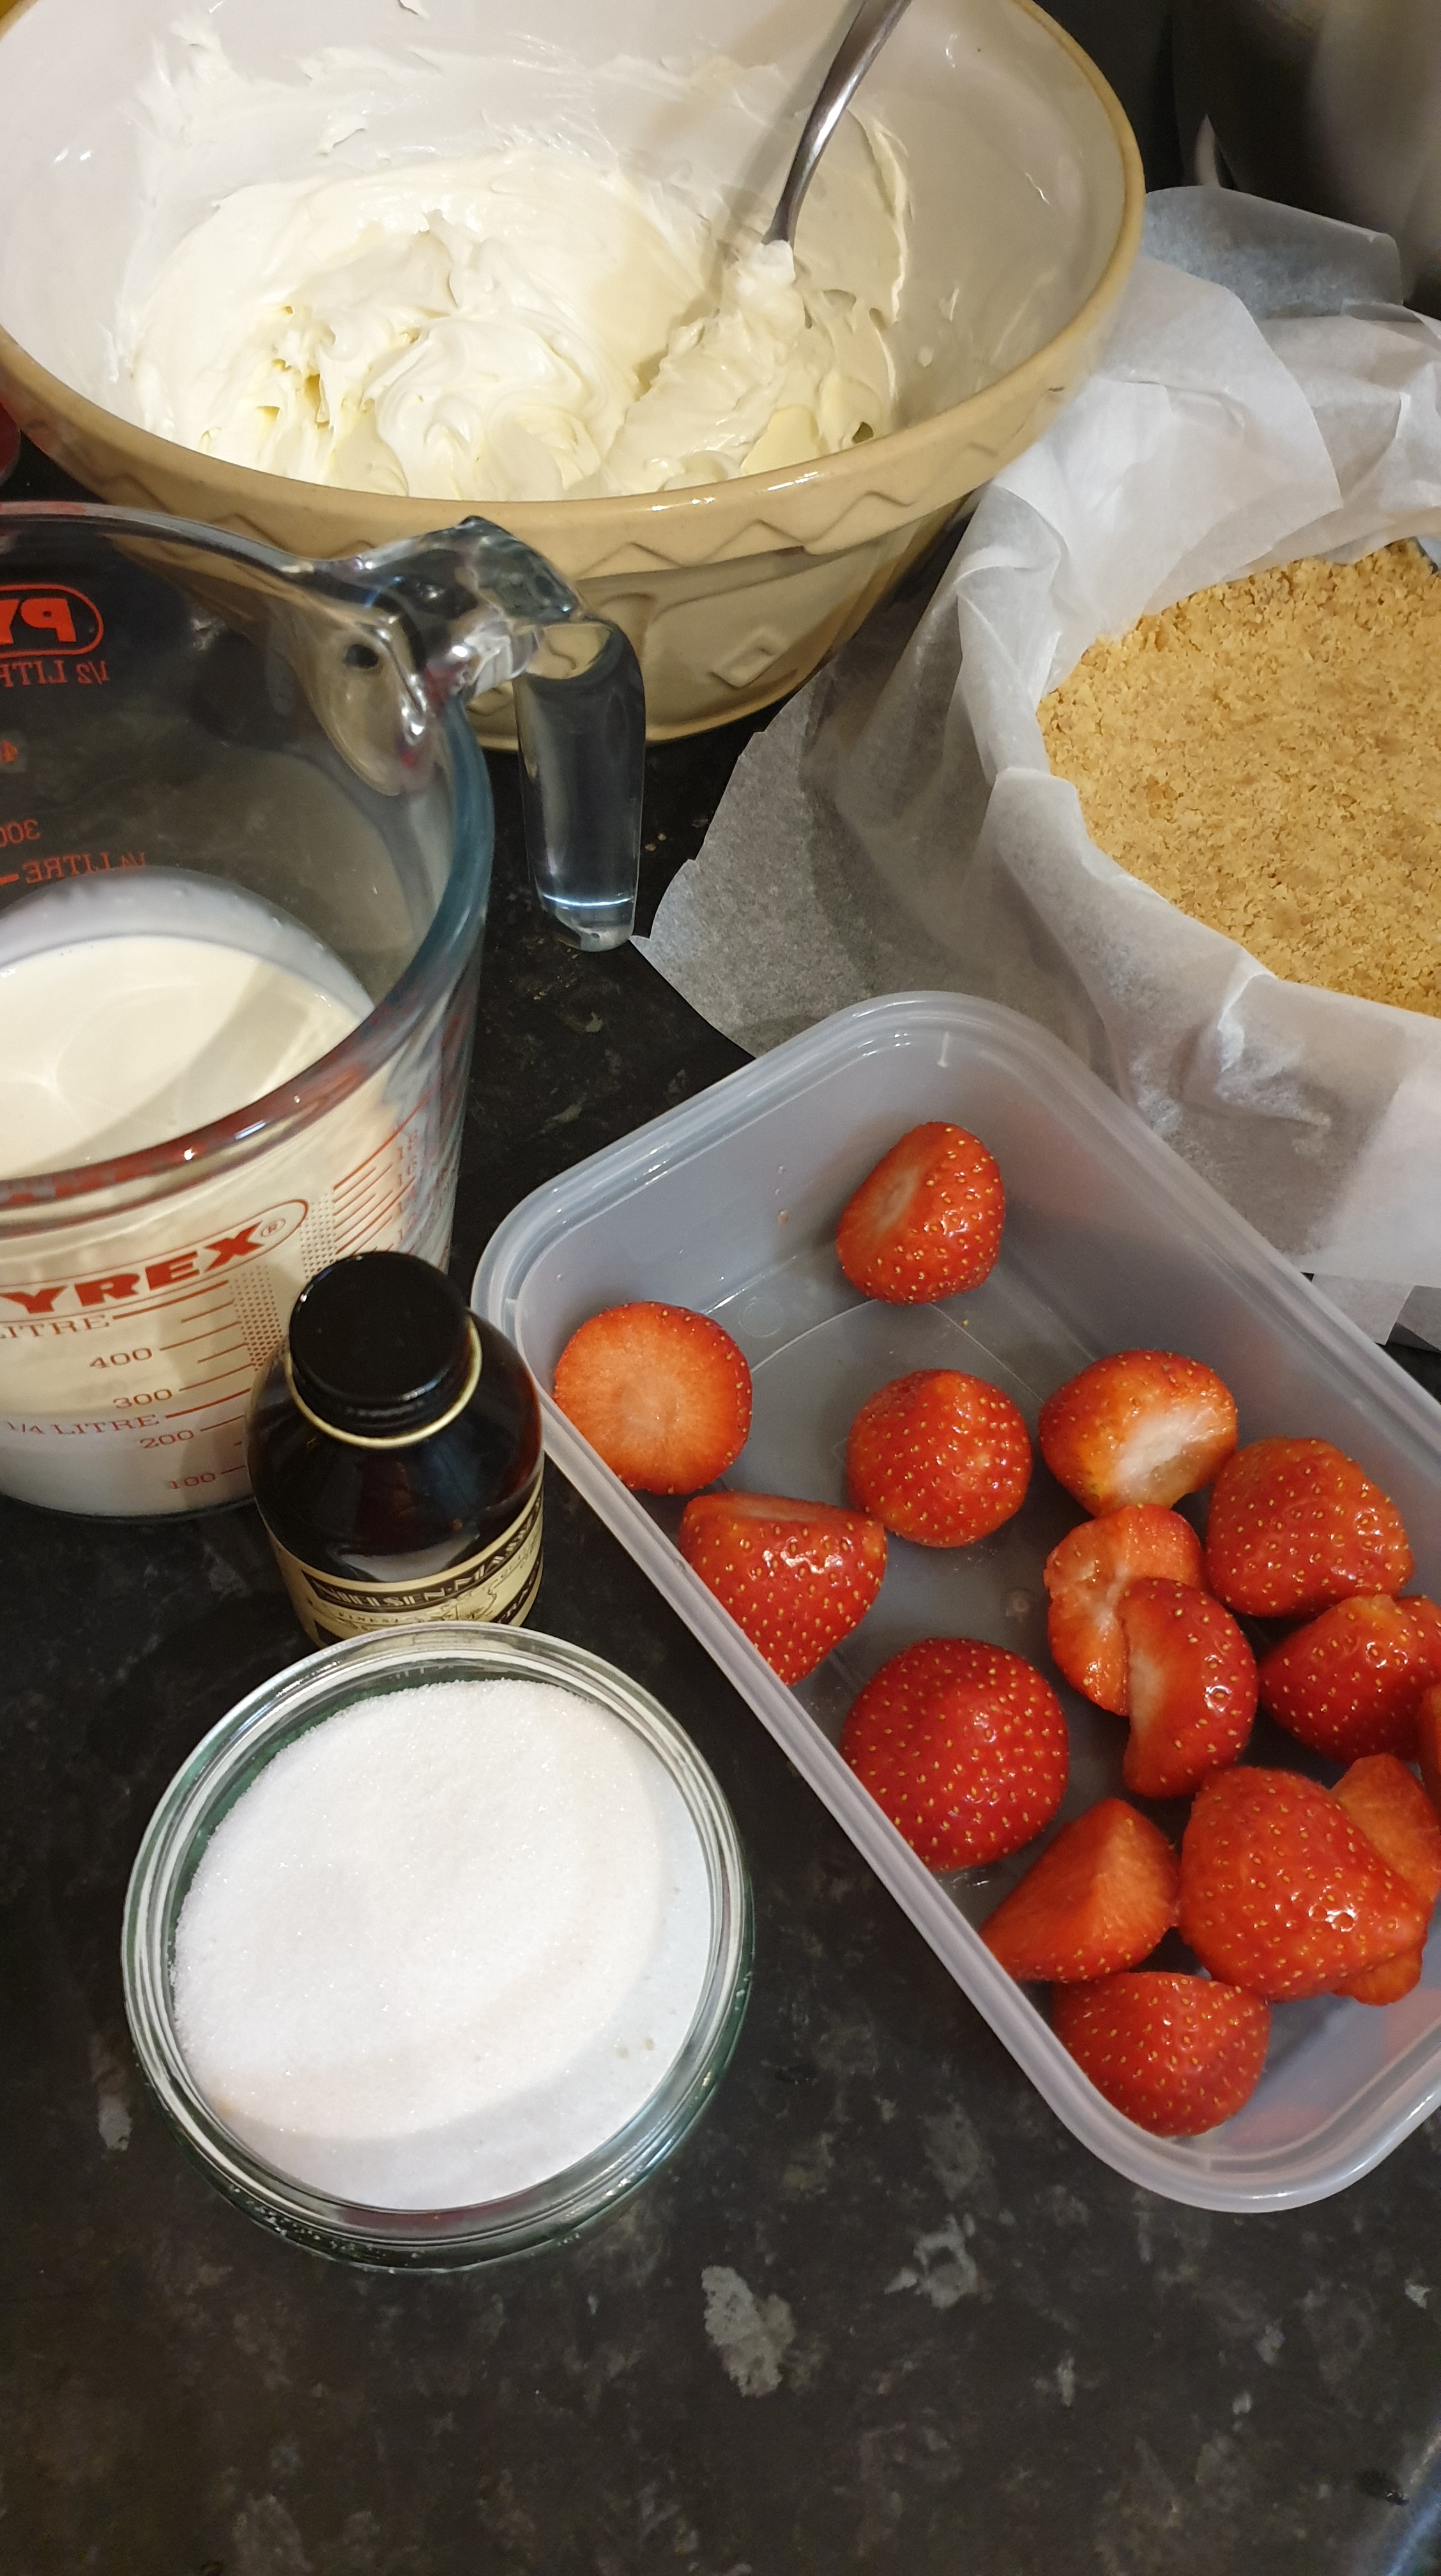
I used my other cheesecake recipe for this, but reduced the ingredients slightly and swapped raspberries for strawberries.
Ingredients:
150g digestive biscuits
50g melted butter
170ml double cream
60g caster sugar
300g cream cheese
125g fresh strawberries
1/2 teaspoon vanilla extract
These will be the speed version – a more detailed cheesecake approach is here for the Raspberry Cheesecake recipe I have used for a few years, which started as blueberries so really, whichever fruit you choose is good.
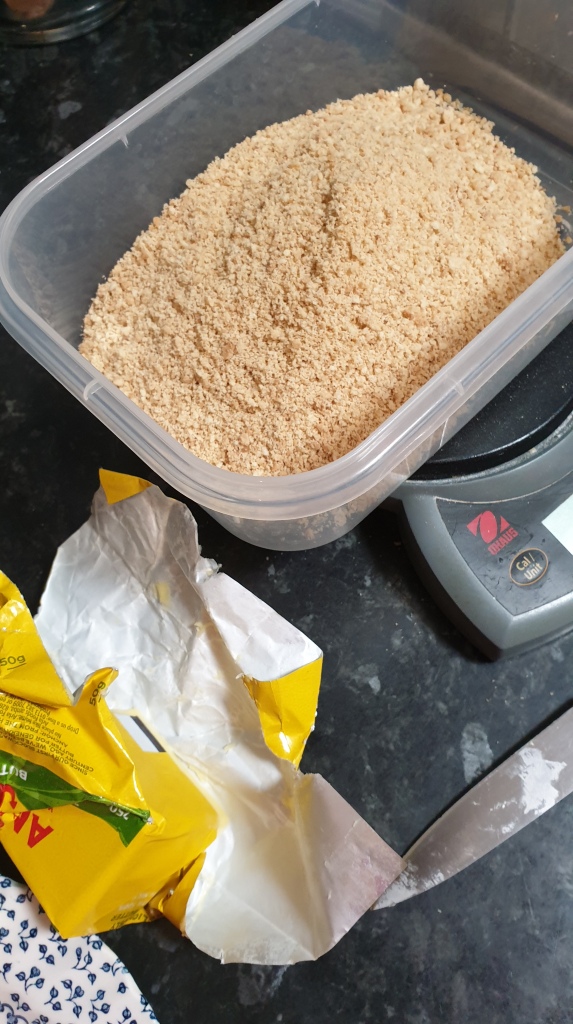
Crush the biscuits, melt the butter. Mix them.
Then put into the paper lined tin and press down, put in fridge.
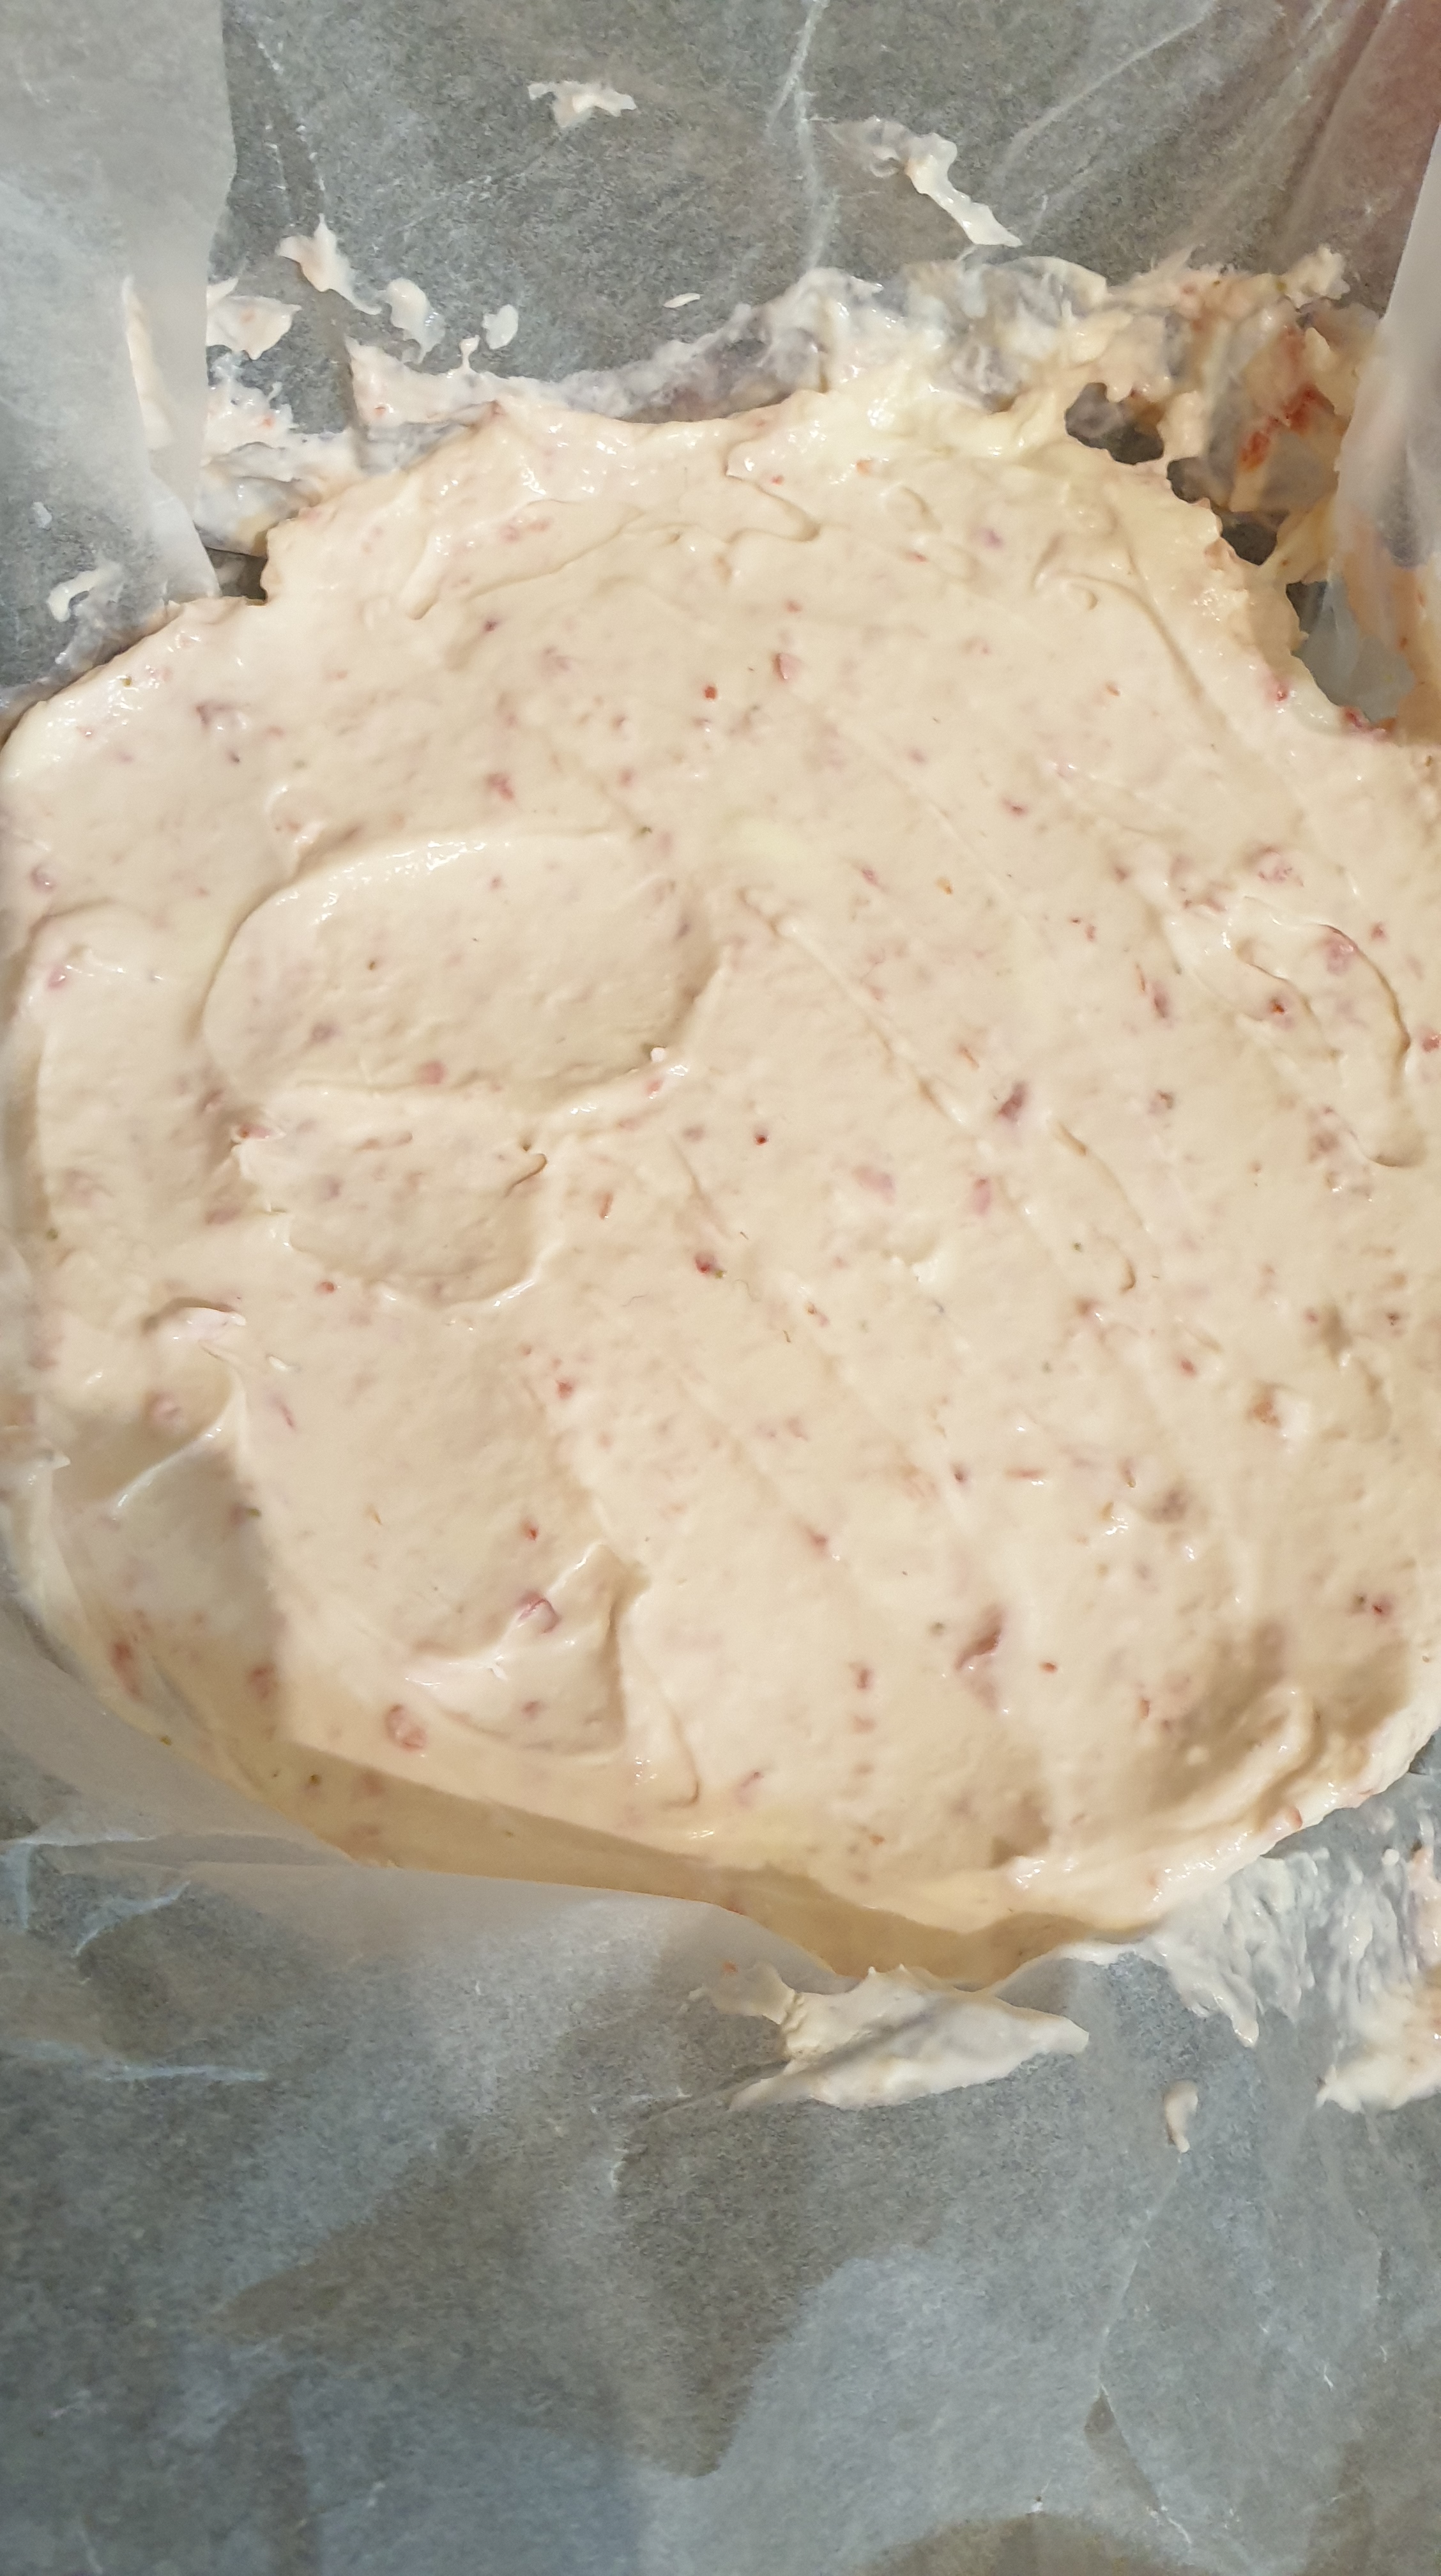
Then mix the sugar and double cream together until super smooth and silky. In a separate bowl soften the cream cheese. Then add the creamed sugar and vanilla extract. At this point I blended about 80g of the strawberries and added to the mixture – folding everything through to make sure all mixed.
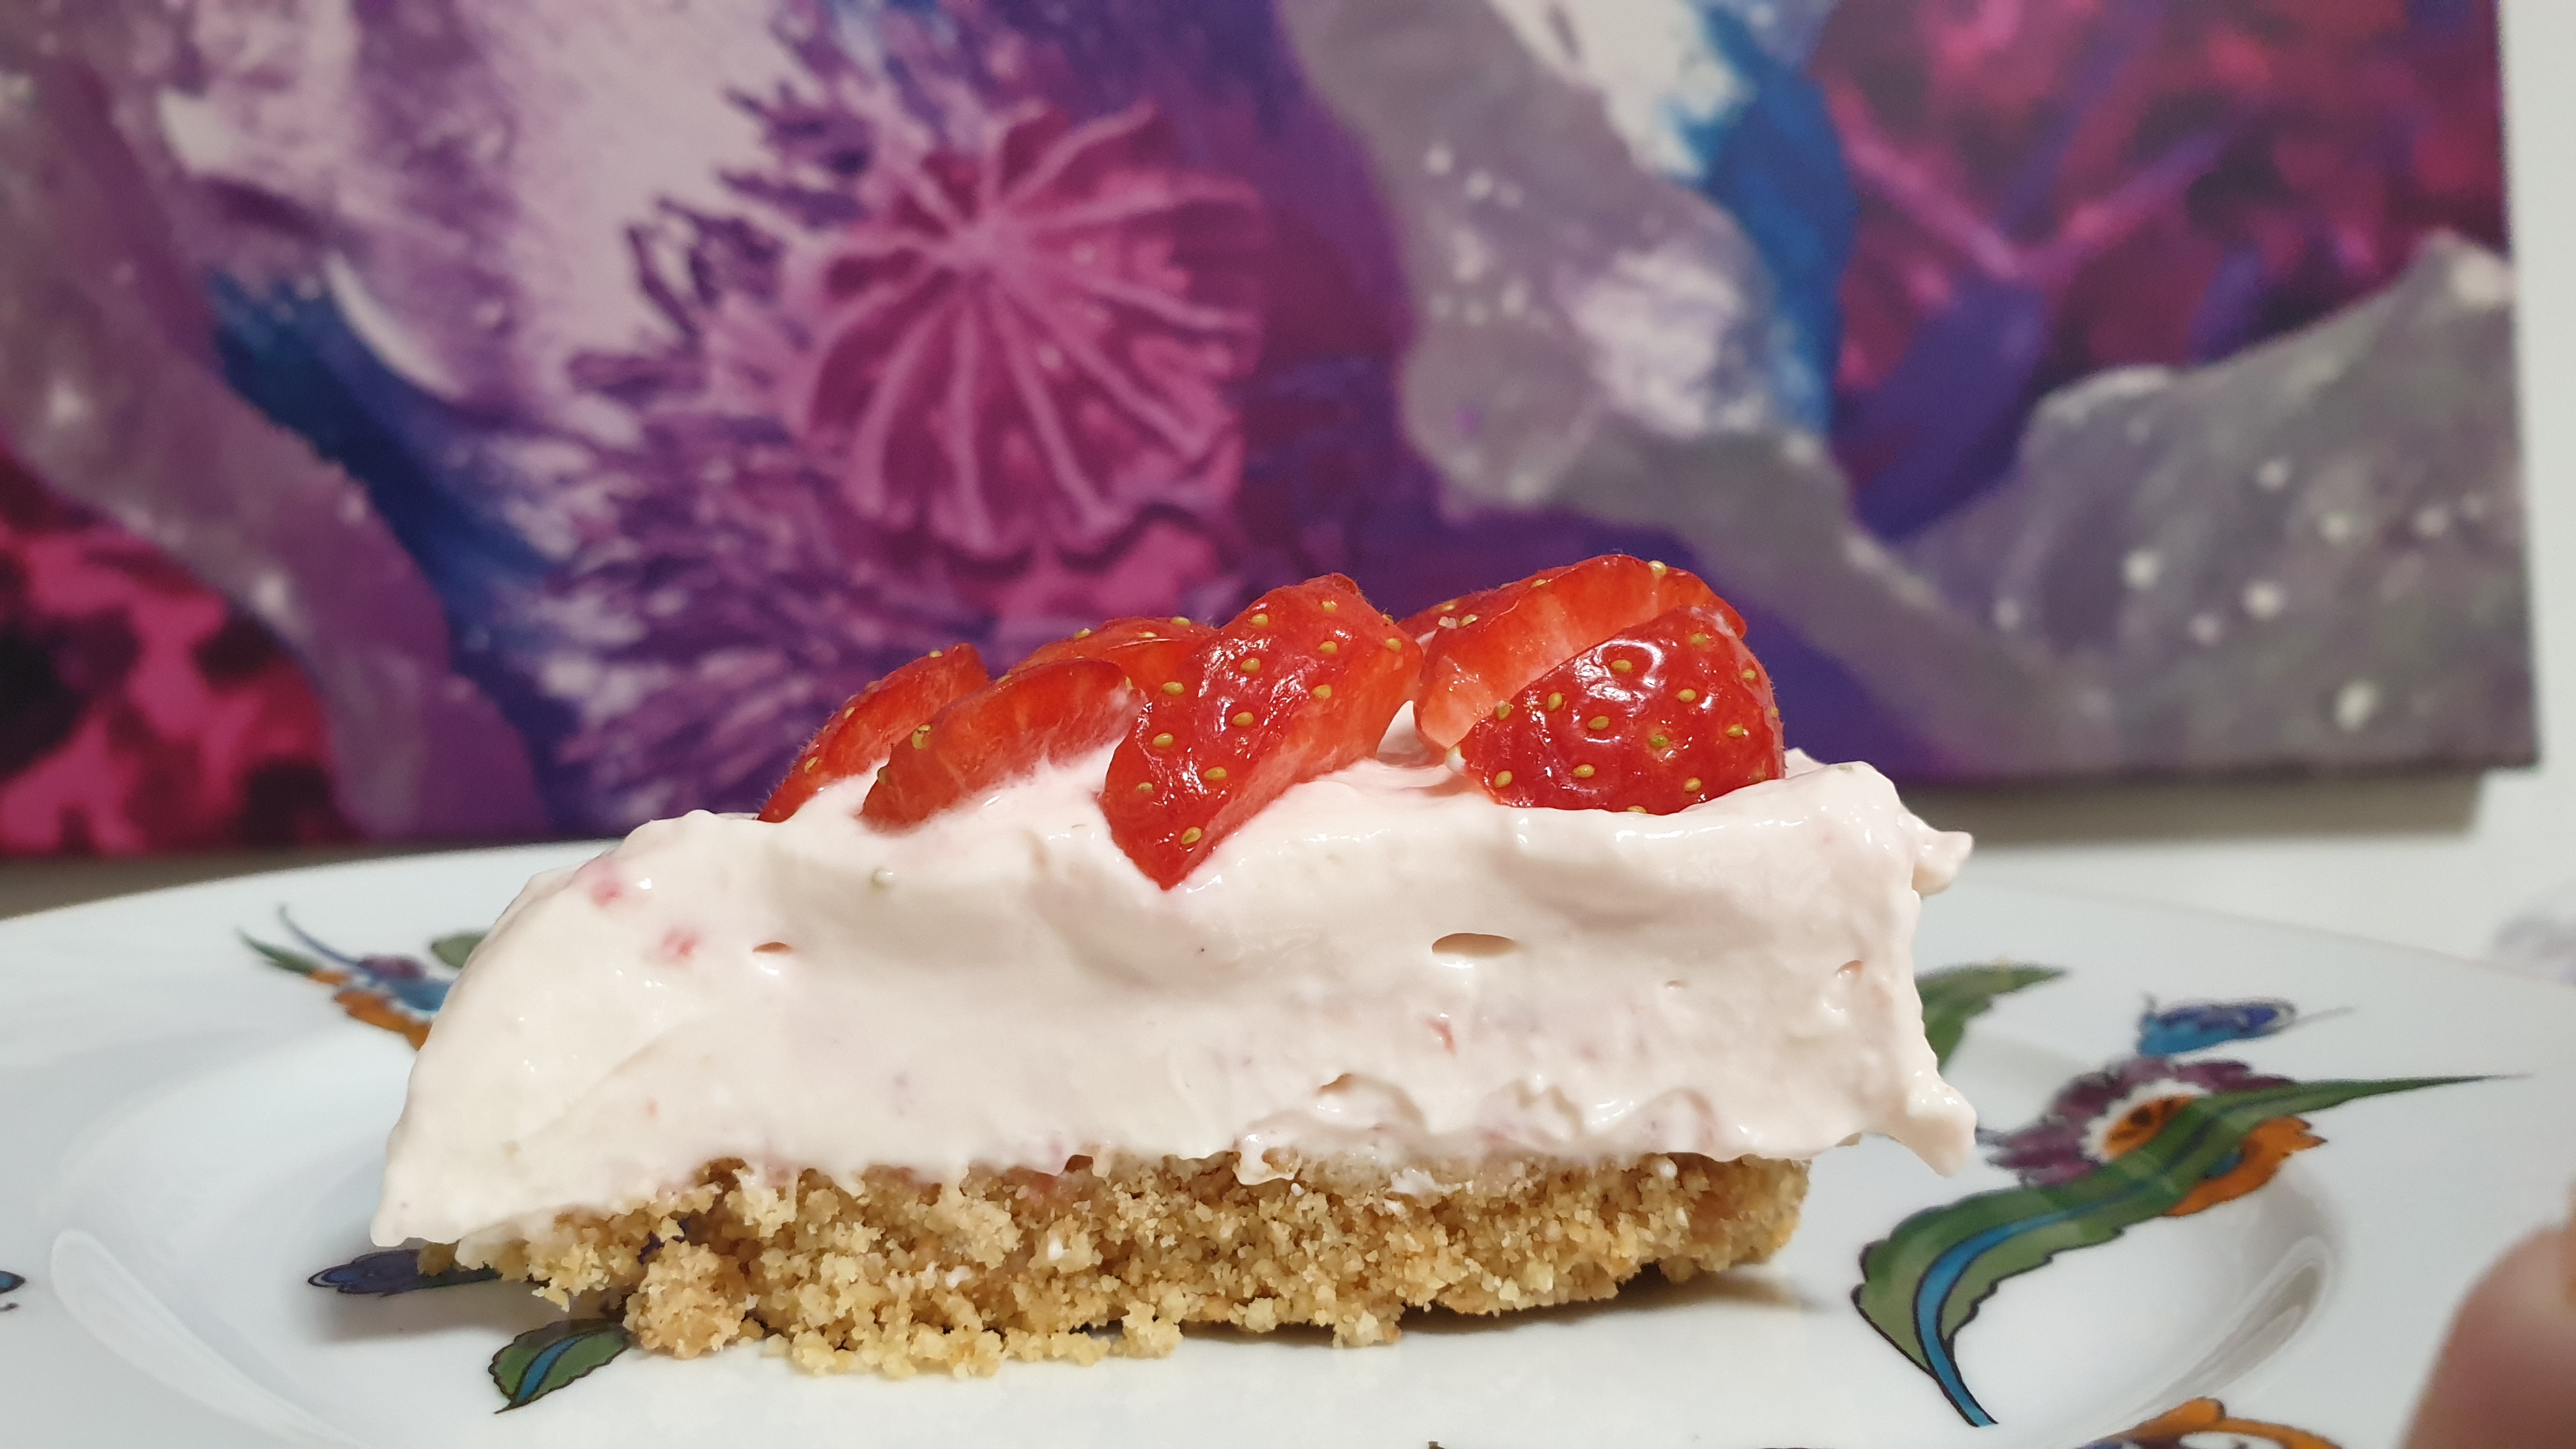
Add the creamy fruity mixture on top of the biscuit base and evenly distribute to the edges. Put back in fridge. Is ok after a couple of hours, but for best results leave overnight. Then I add fresh cut strawberry when ready to serve.
As we won’t eat the whole cheesecake at once, I dress each piece with strawberries when ready 🙂
It was rather delicious and makes me wonder why it took me so long to make one!
So, same method as the previous recipes for orange creams and strawberry creams, but I halved the recipe again so I stop building up a stockpile of cream fillings!
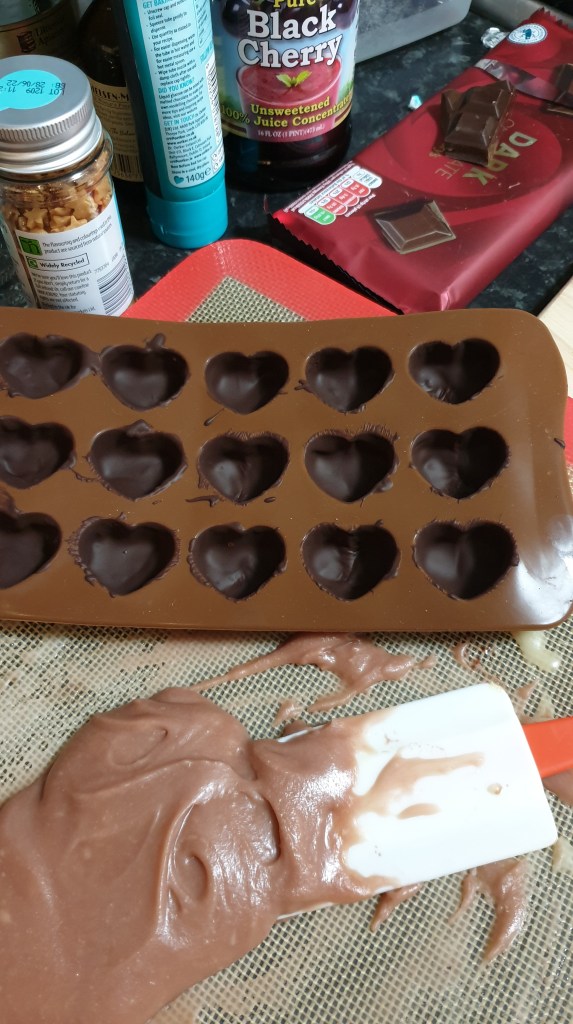
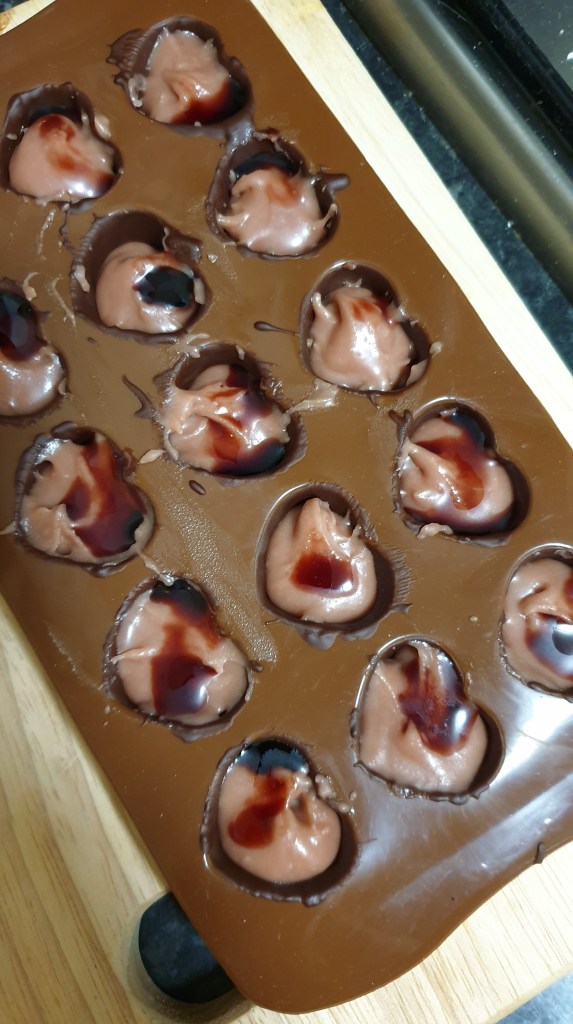
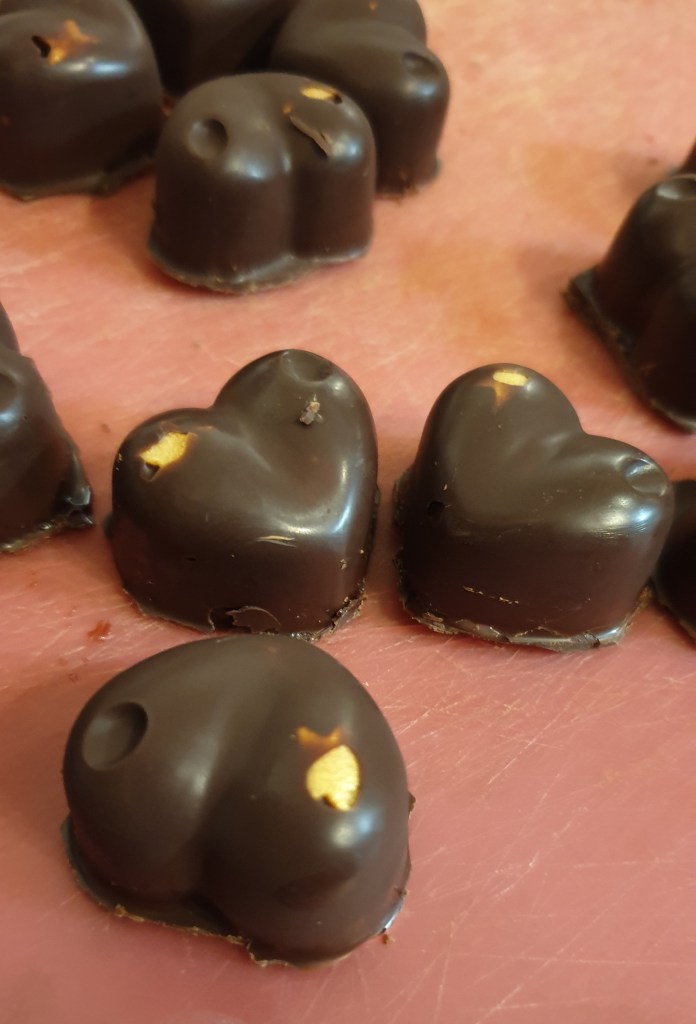
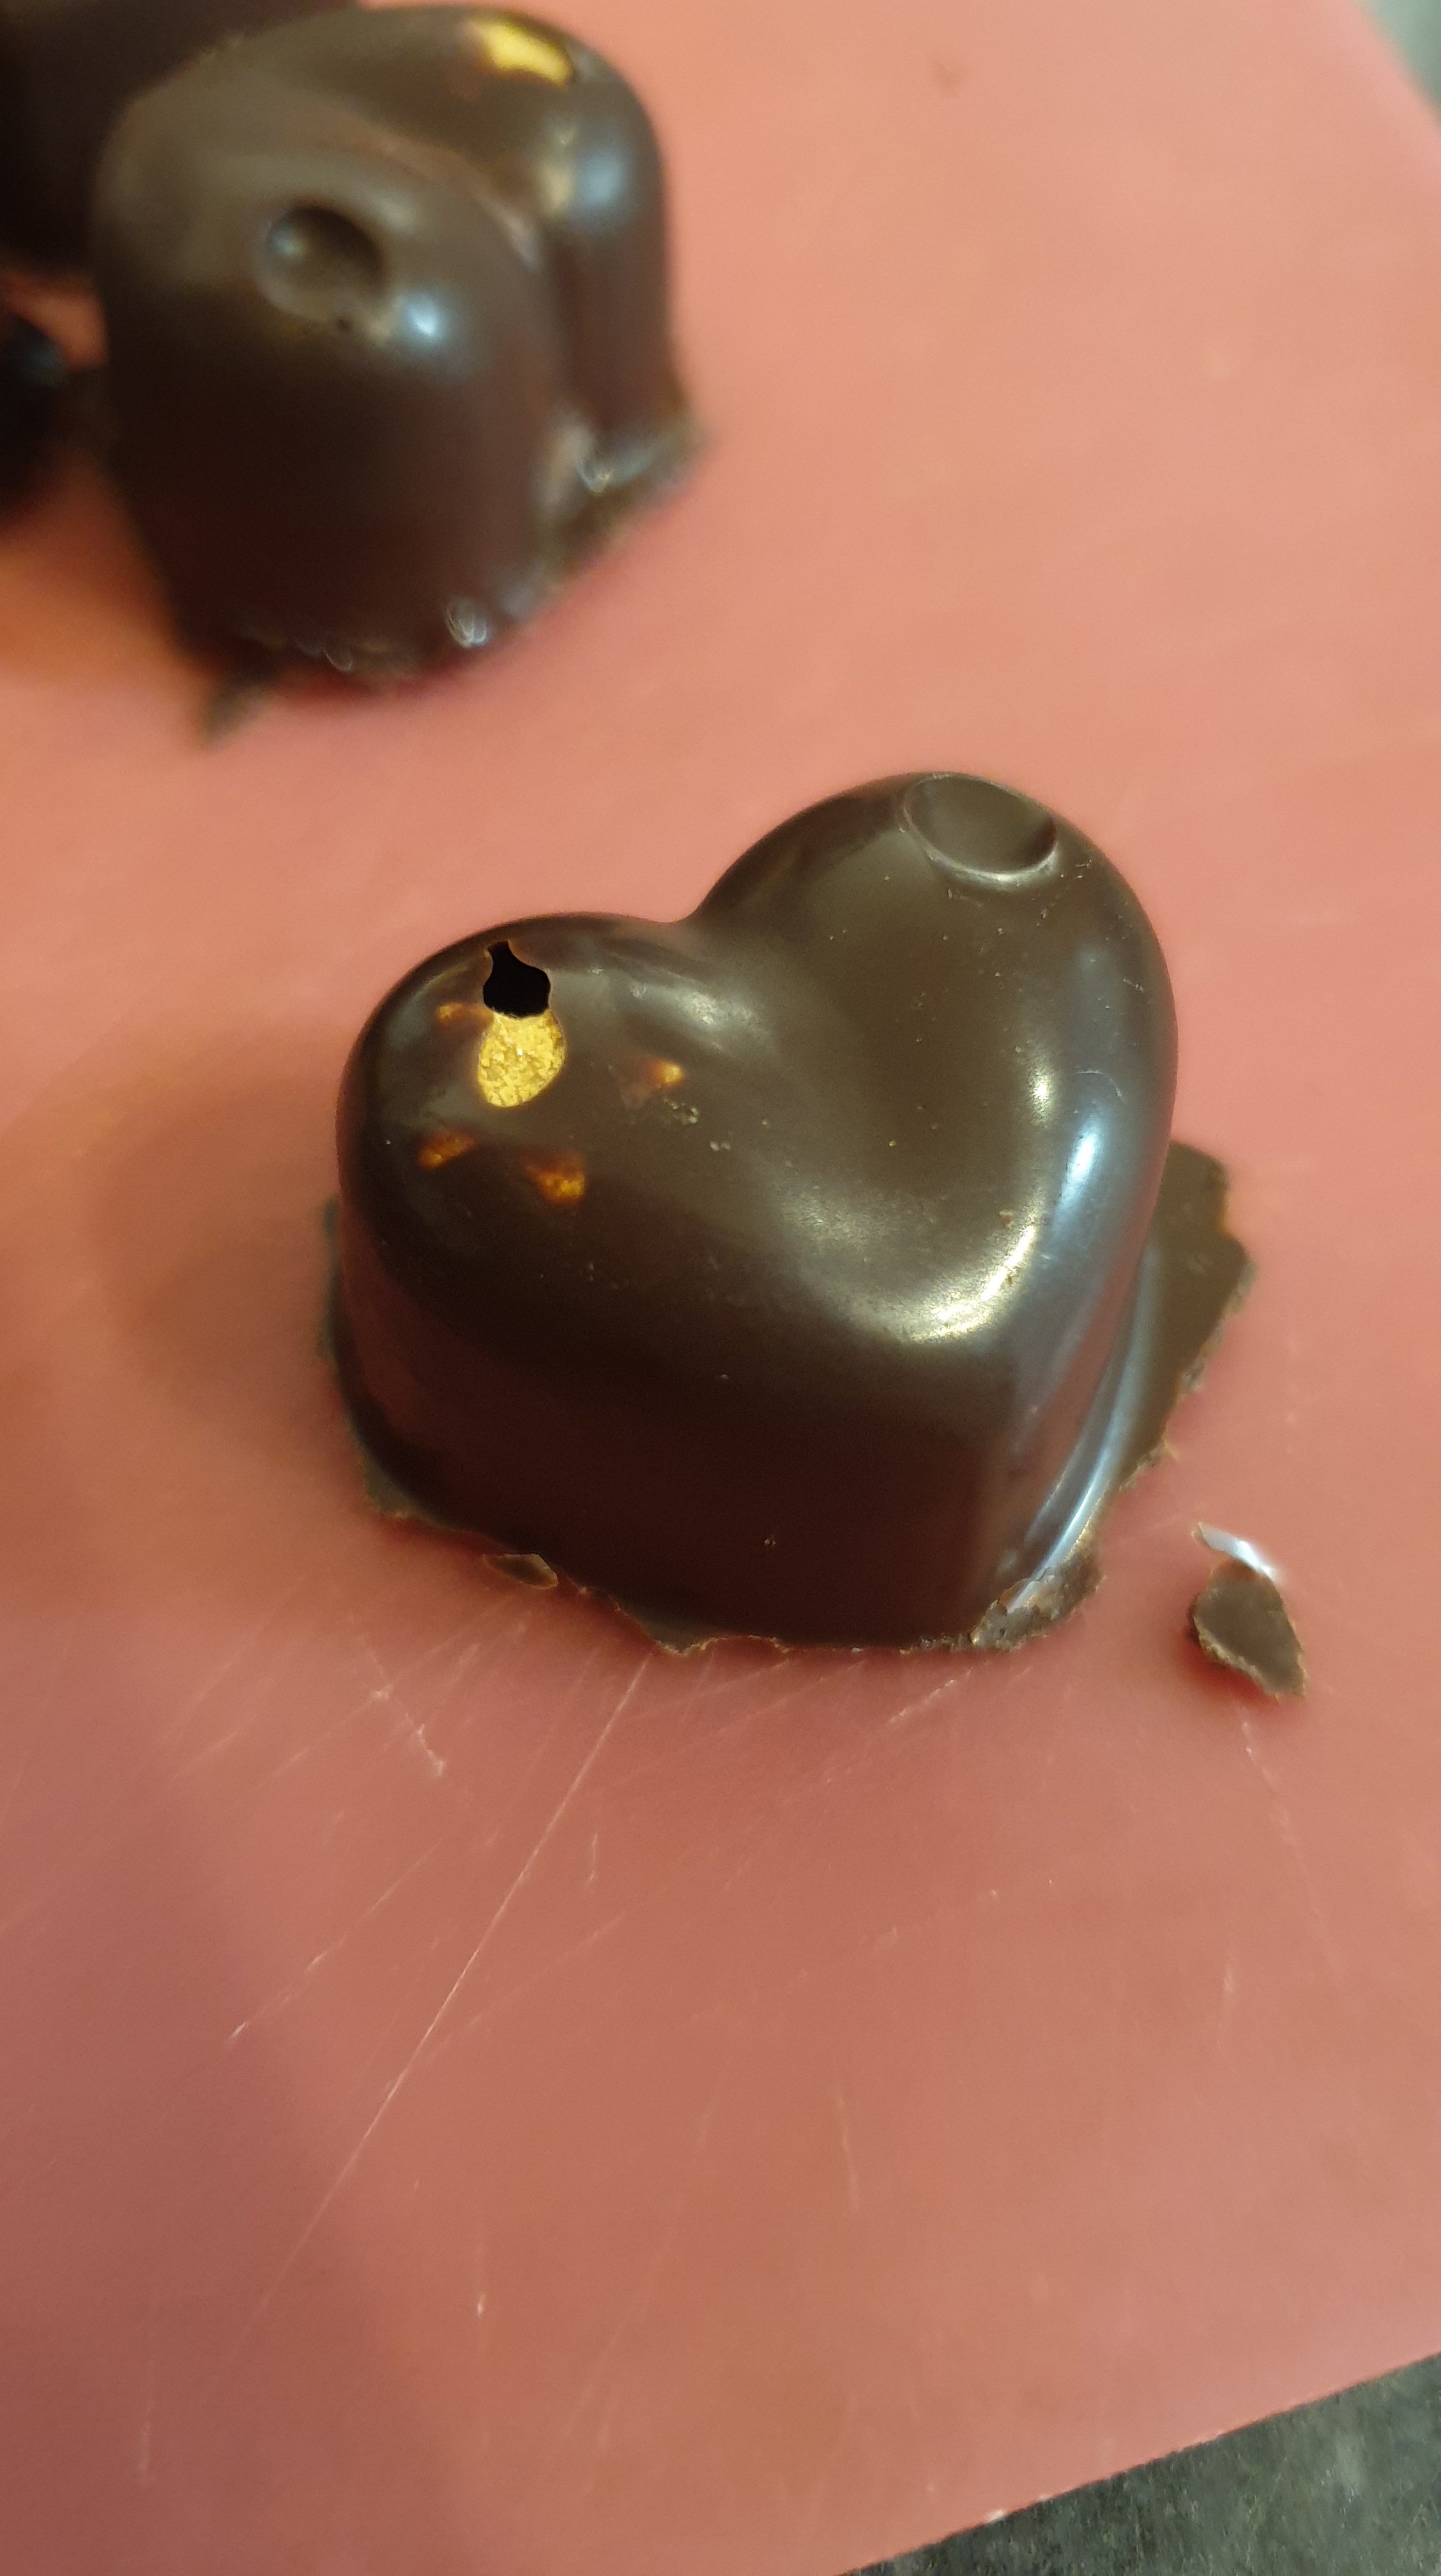
Thought I would be fancy this time, and try and get some gold stars in, realising after they would be enveloped by chocolate.
For the filling i used black cherry concentrate, and a few drops of vanilla. The cherry doesn’t as well i would have liked it to, and I used a good 5 teaspoons of it. Great colour though.
Then, to be super special, I thought i would put a few drops of the cherry juice inside each chocolate before sealing them. On reflection I should have made a small nook in each, as as soon as it was done, I knew it would seep through the chocolate.
But they turned out ok, and has hints of cherry rather than a blast of flavour like the others.
So, making Orange filled chocoloates wasn’t enough and I now have the bug for making cream filled chocolates. I decided to go for strawberry, with a plan to send some as a gift to my grandpa who adores chocolate and said feel free to post them to him anytime. Say no more…
Same line up as the orange (although at the last minute decided to use a star mould), and used strawberry syrup for the filling. And a pinch of edible glitter, because you know, its christmassy.
I halved the recipe again from the first one, so –
Ingredients
half a cup of double cream,
200g of sugar
100-150g of dark chocolate
Soaked together, then heated to 240f, and a whole tablespoon of corn syrup. The consistency was much sticker and more toffee like for this one, then let cool (adding a small amount of butter and turning over first). Then i mixed in the strawberry syrup, leaving some streaking through (and the glitter). Around 80g of chocolate melted for the mould, then in the freezer for at least 10 minutes too set before you add the filling.
Chocolate moulds filled with strawberry, melt the rest of the chocolate and then cover each splace, smoothing over with a pallet knife if really bumpy, and back in the freezer to chill, then in the fridge.
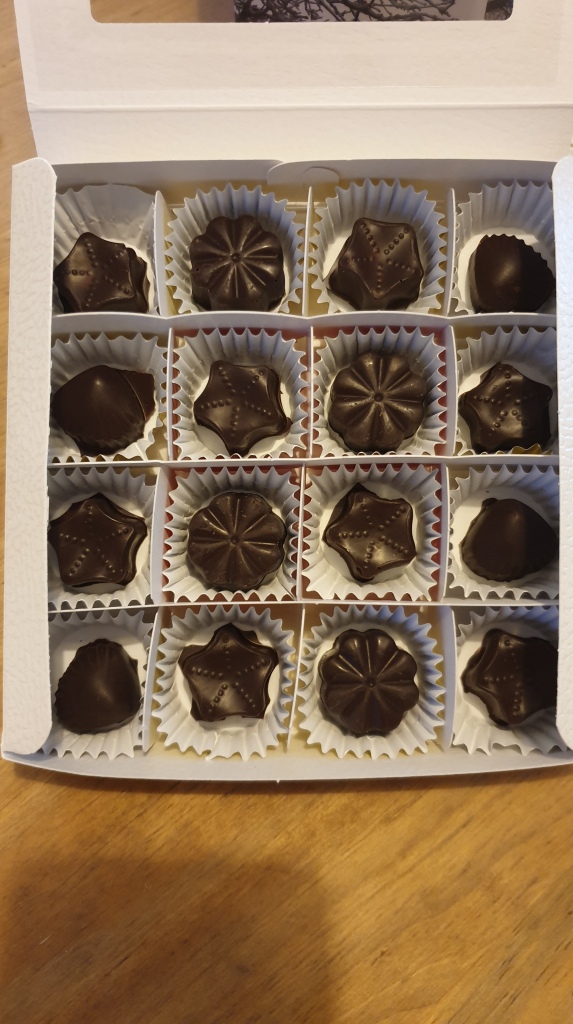
Proper tasty, and I also made some orange shells yesterday with the left over orange filling to have a variety to send.
And now they are boxed up ready to be sent tomorrow after buying a few boxes and little cases for them to stop them sliding around in the dividers. I am rather pleased at how they look and am pretty sure I won’t be buying certain brands again. I’ll be making lemon ones at the weekend hopefully so we’ll see if this is a fluke, or if I’ve got the knack 😉
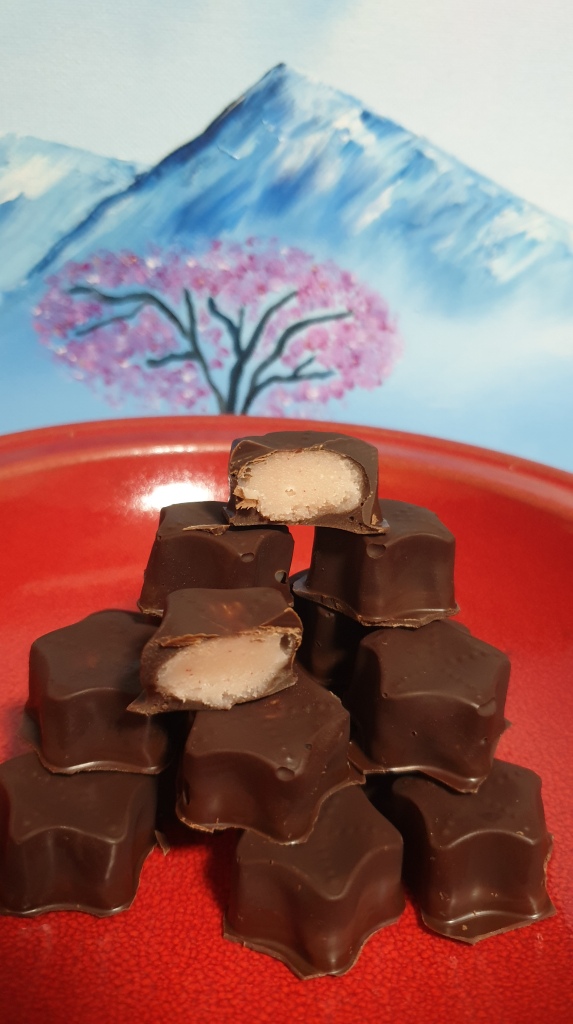
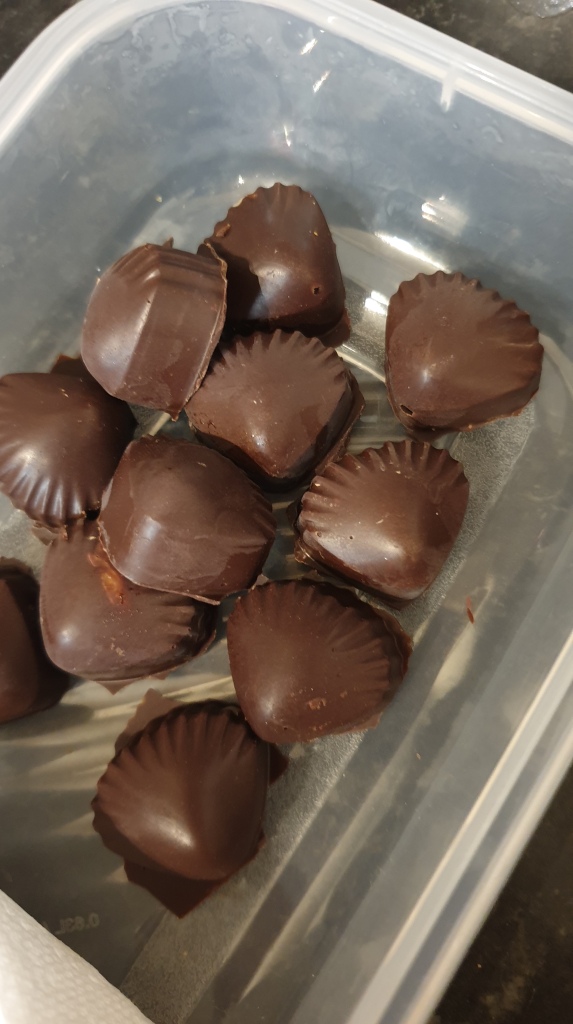
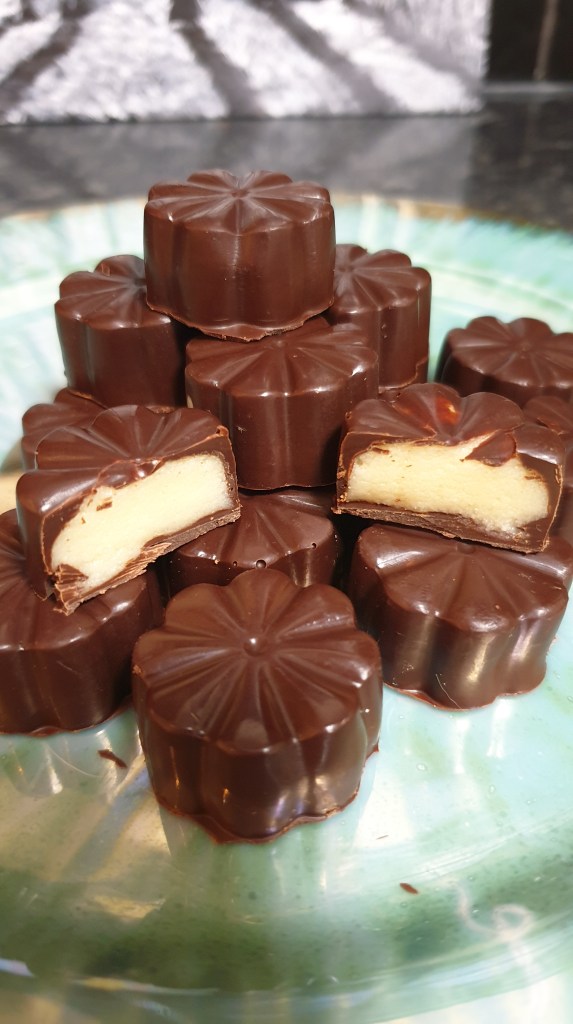
These are my favourites, and not content with only one or two in a box of popular variety chocolates, I decided to finally attempt making my own. I like baking, but sweets and desserts are my favourite. I found a recipe that seemed doable, I halved the ingredients to make a small batch first, and amended slightly as I went. I was actually left with half of the filling left after making this batch, so you could half this again of you want a small amount.
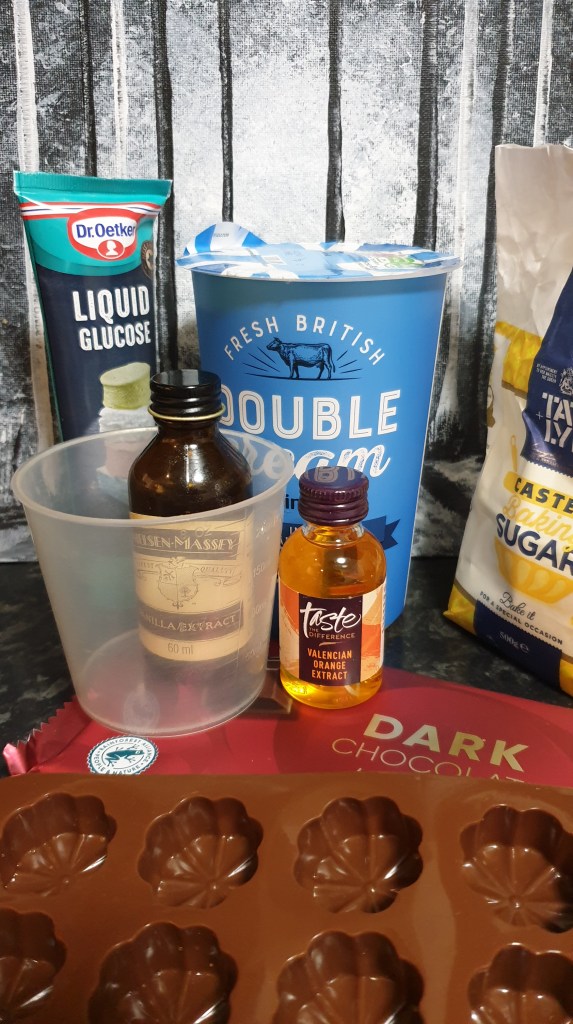
Ingredients
1/2 cup of double cream (250ml / 8oz)
1 1/2 cups of sugar (this was a mix of caster and granulated)
2-3 tbsp of orange extract (apparently if using orange oil, use less)
1/2 tps vanilla extract
1 tbsp of corn syrup (also know as liquid glucose)
1tbsp butter
100g of dark chocolate (ish) – or any chocolate of choice
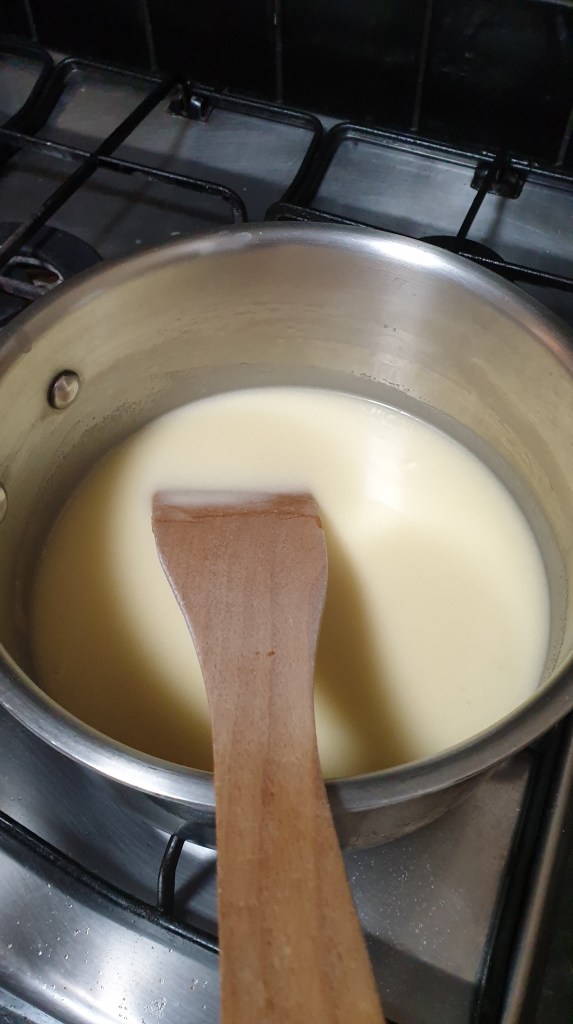
You’ll need to make the orange filling first. Place the sugar and cream in a pan and let them soak together before putting on a low to medium heat. Stir often and make sure to keep it smooth. Use a pastry brush to water the sides while it’s heating, otherwise the sugar crystalises and can make the mixture gritty. Bring to the boil and add the corn syrup, keep stirring, feeling for when its thickening up. Depends on how solid you like your filling, waiting until it gets sticky will give you a firmer centre.
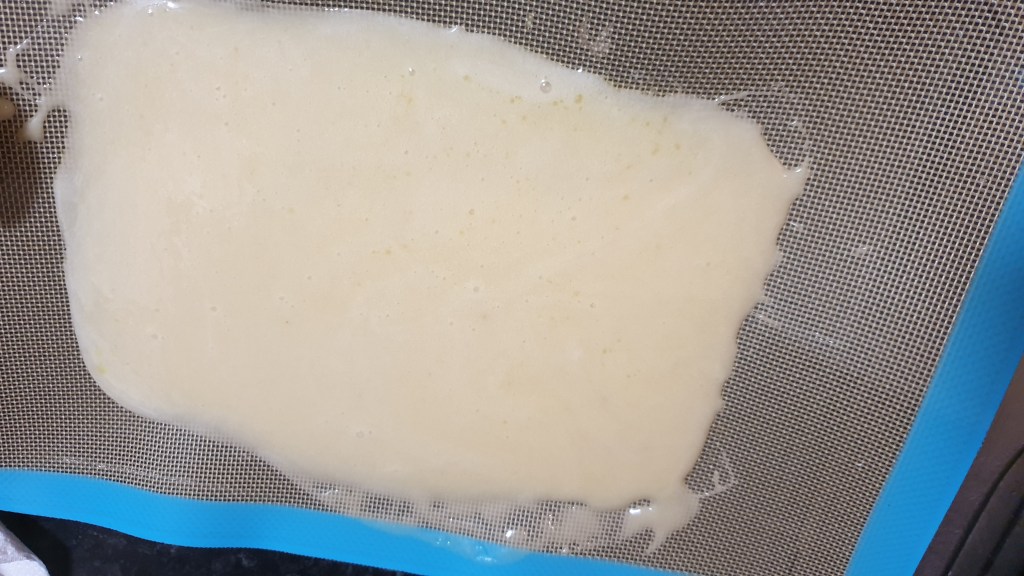
Once you are happy with the texture, pour onto a highsided tray (avoid scraping the sides or the gritty sugar will come with it) – try not to use glass as this mixture will be very hot and may break it. Now, I don’t have large marble slab to hand like the person who’s recipe I checked out, so I used a baking tray with sides, and laid one of my new heat proof baking sheets clumsily in it.
Once there, leave for 10-15 minutes to cool. It would appear that I may have used too little corn syrup (so you may want to use 1-2 for thicker), but it didn’t seem to matter. This worked in the end, so must have been ok. The next process it to turn it over and over, and in on itself for a good 20 minutes or so. It was during this process I decided to add the orange extract – around 1 tablespoon at a time, work it in, keep the mixture moving. Taste it and see how orangy it is, and add more as required. I would say you want to keep working it to be like slightly runny mash potato consistency. Then leave that to one side while we move to the chocolating the cases.
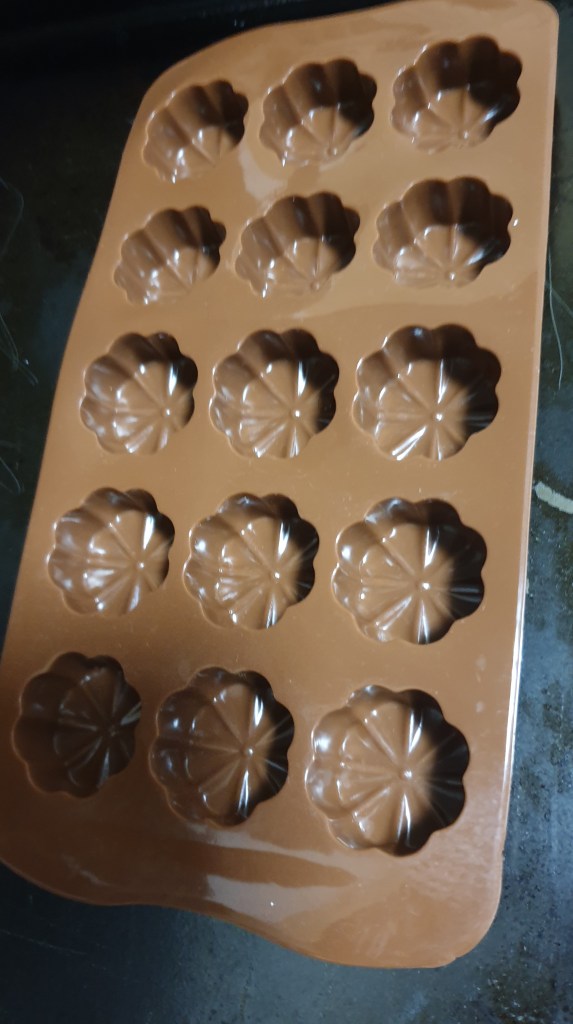
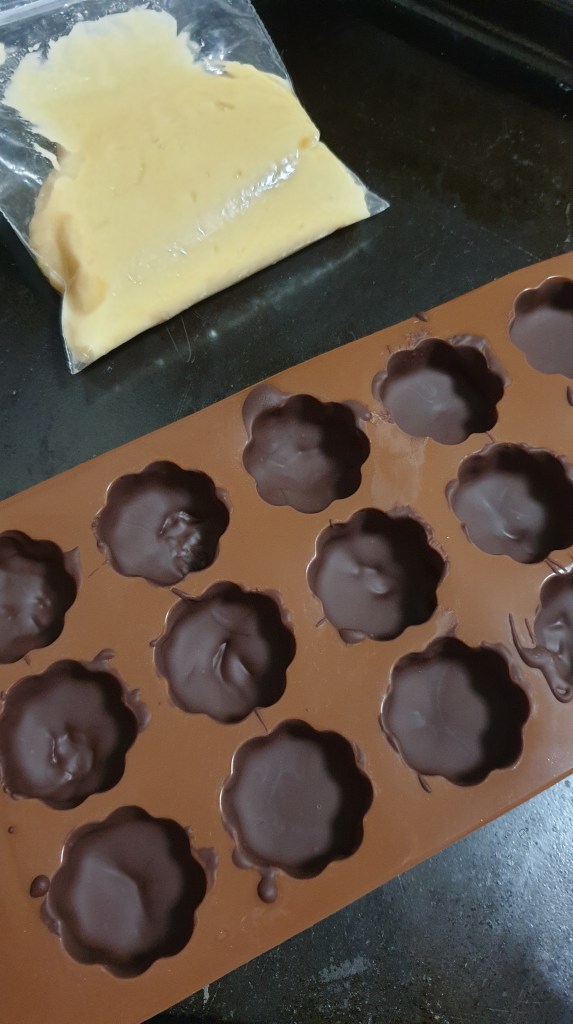
Pick your mould.
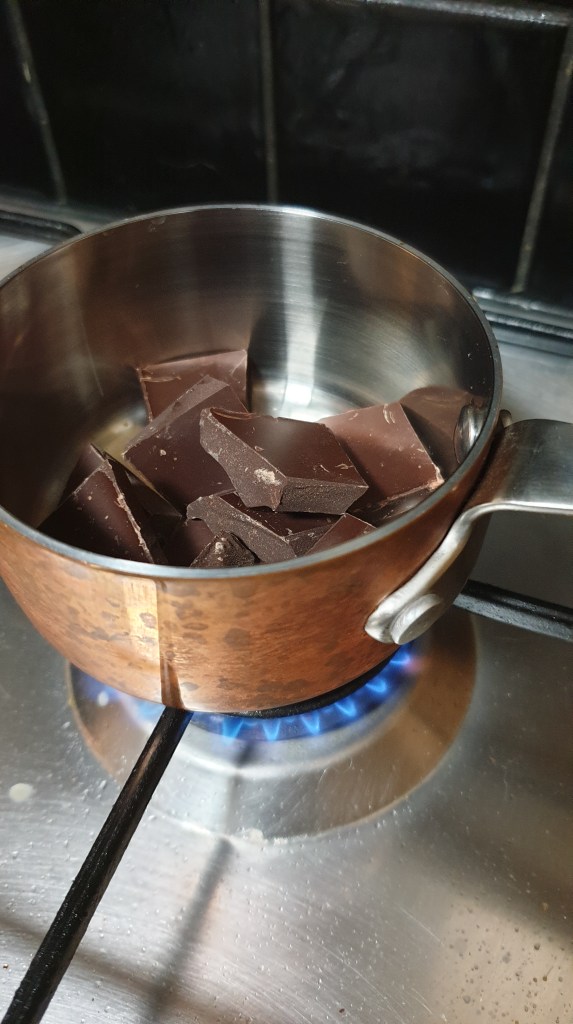
Melt your chocolate.
This was enough chocolate to coat the mould.
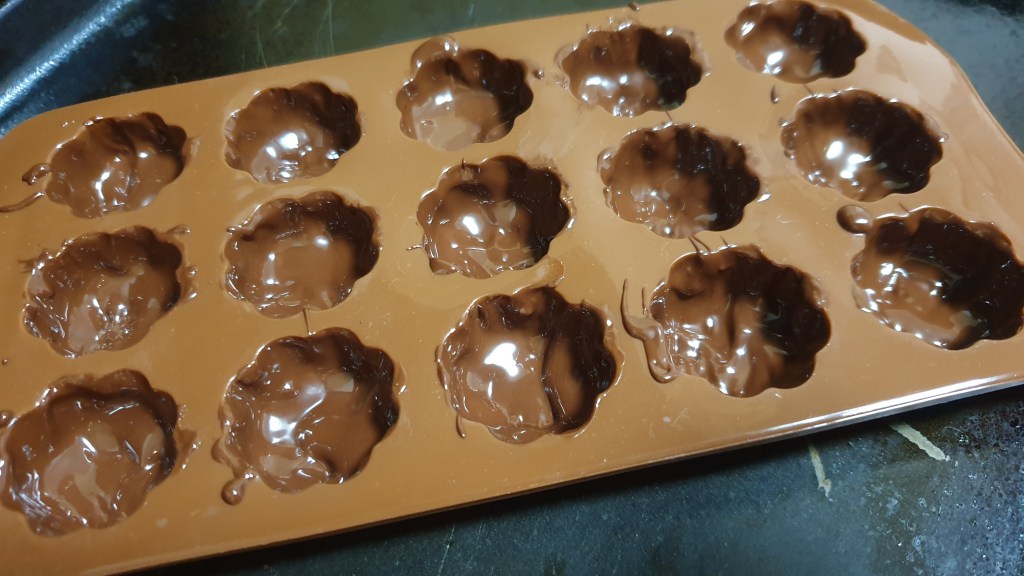
I used a small spoon to put some in each space, then used a paintbrush 🖌 to get the chocolate up the sides. Then put in the freezer for about 15 minutes.
I didn’t have a pipping bag, or a proper zip lock bag, so used a small plastic bag with small sealer (remember to actually seal it though! I didn’t 🤣). And just cut off one corner to squeeze out enough mixture into each space.
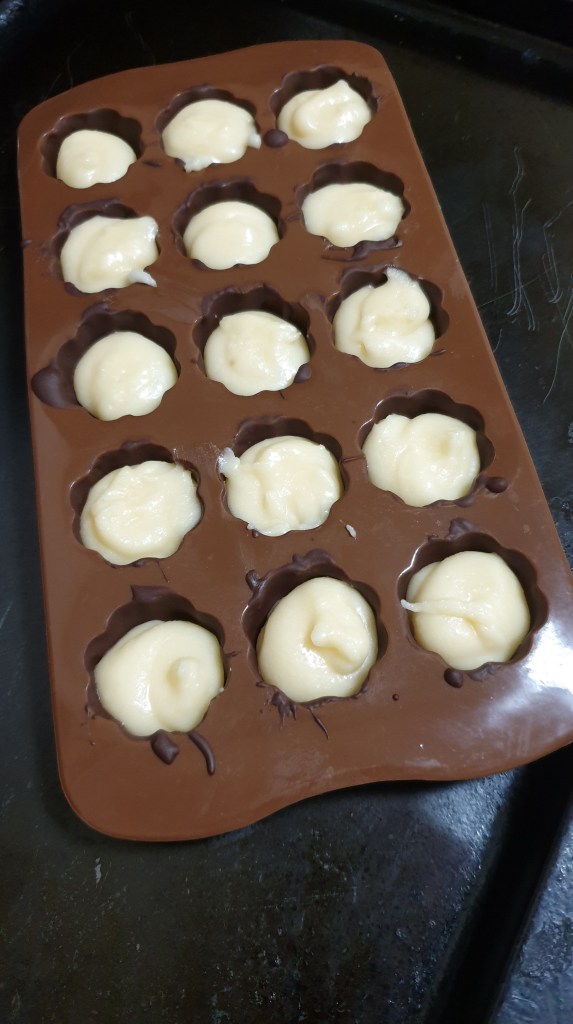
Fill each mould space with filling, but not quite to the top. Then melt up the second round of chocolate and place over the top.
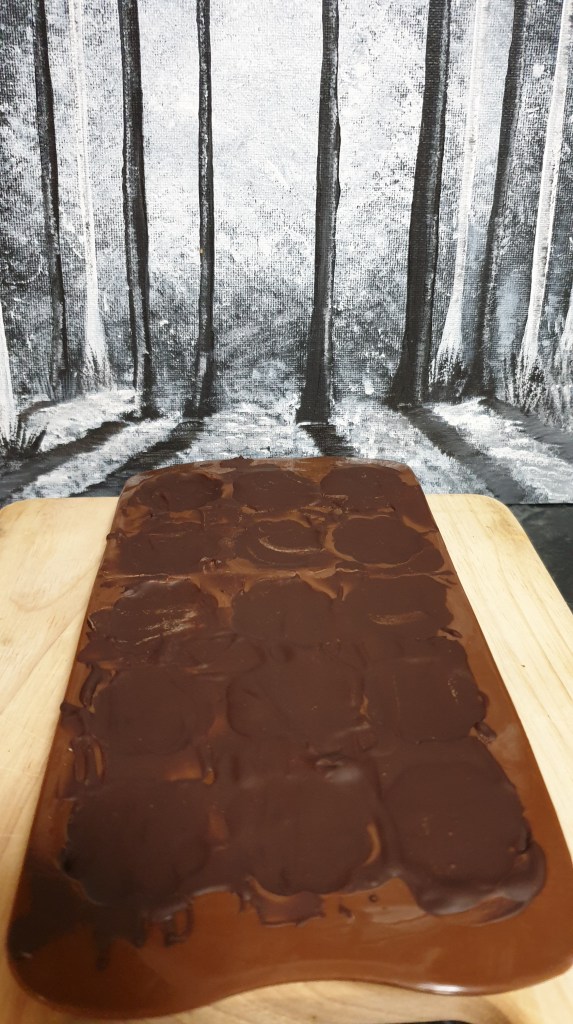
Smooth them over with the back of a spoon or small pallet knife (art supplies came in handy for this kitchen time). I then put them in the fridge for an hour or two but you can put in the freezer for 20 mins maybe if you want them quicker. Then remove from the mould.
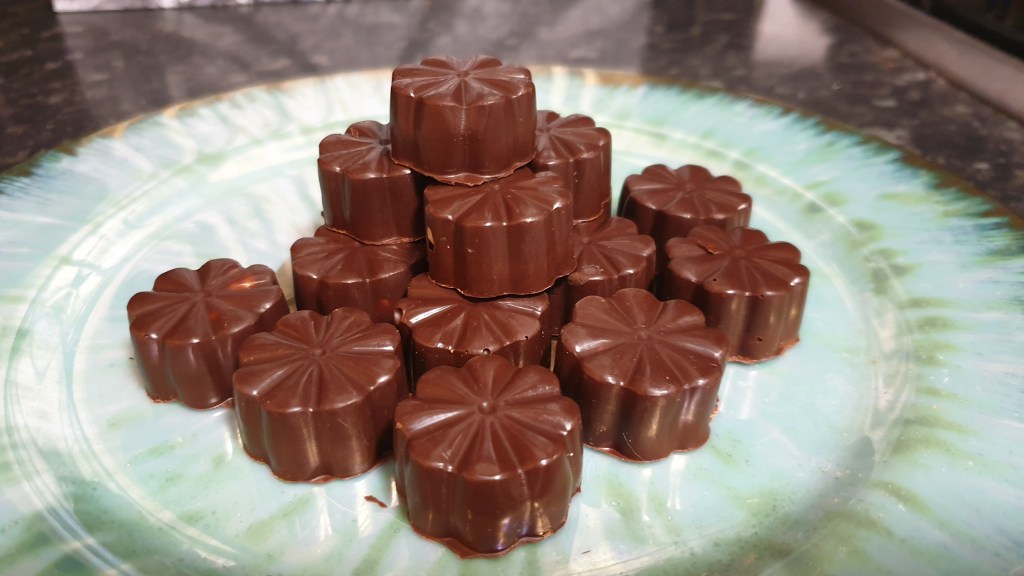
They were super easy to turn out, and looked perfect. After being in the fridge overnight, the filling had set even further but was still super soft.
I’m going to admit, I was very chuffed with myself for manging to make something that looked and tasted this good first time.